Intro
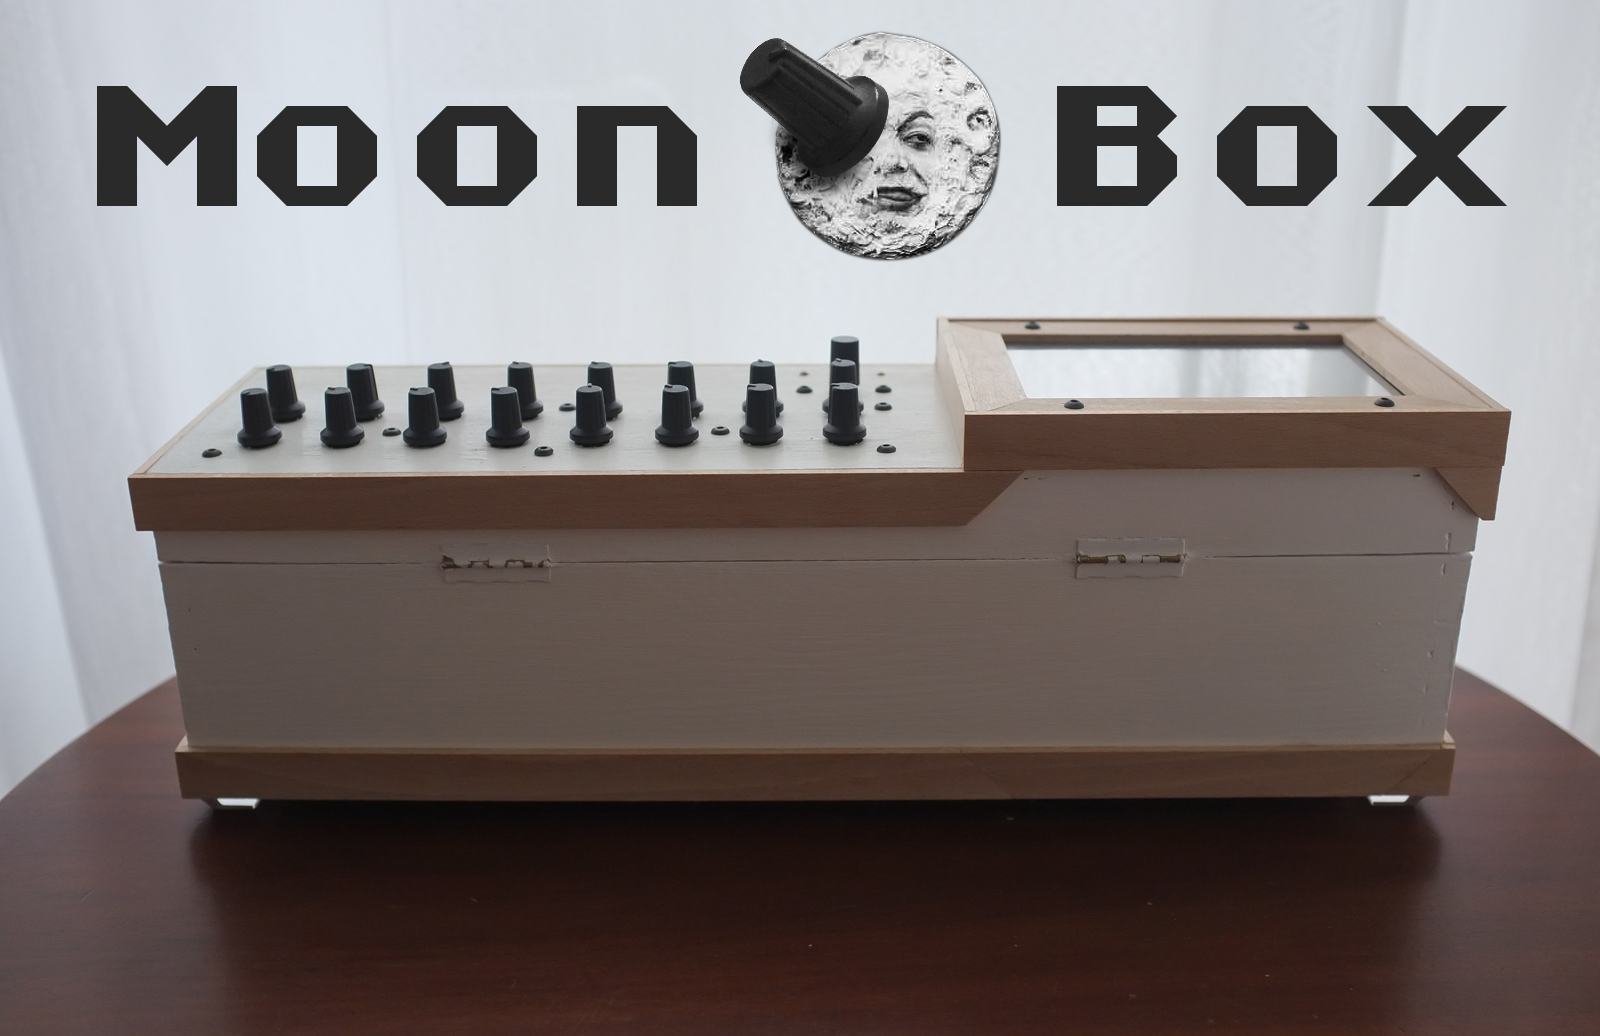
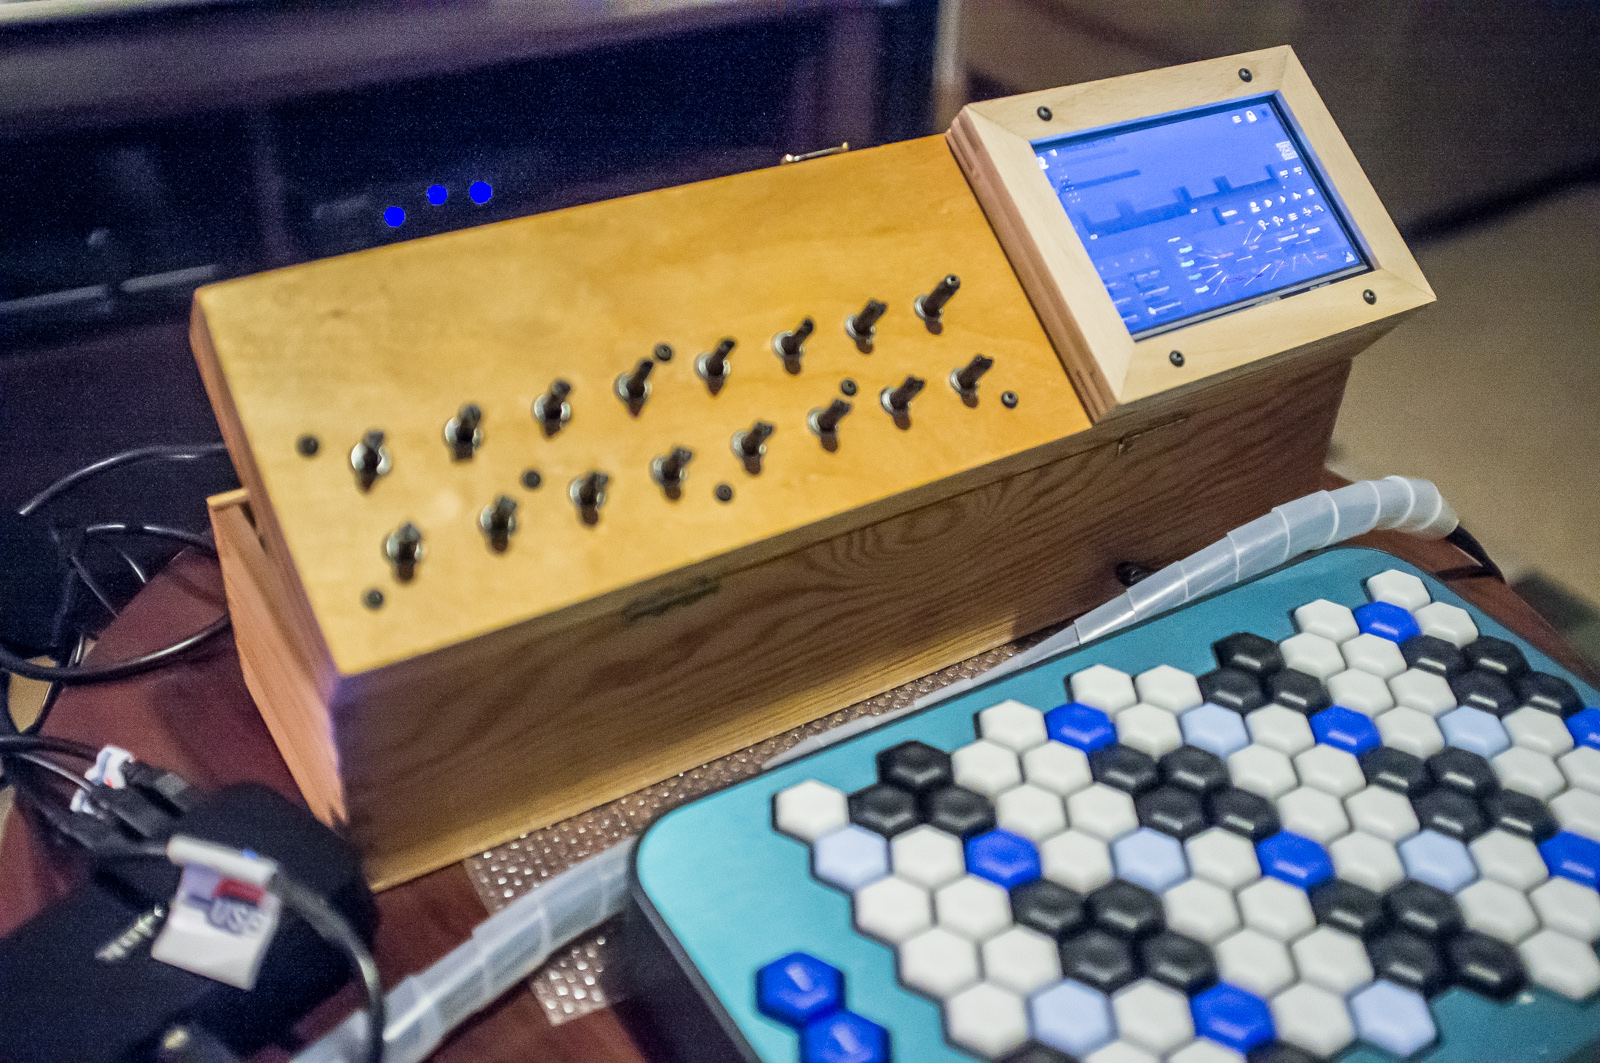
In this article I would like to share the way I’ve built the MoonBox – Raspberry Pi 2 Synthesizer powered by awesome multi-platform SunVox Virtual Modular Music Studio. The name MoonBox title expresses the link to SunVox, as it’s smaller celestial brother. Also the color of the box came out kinda ‘moonish’.
MoonBox is pure DIY project and currently I don’t see the chance of producing this box commercially to answer some of the questions I’ve received. I can imagine putting together a DIY kit with all the parts, laser-cut custom designed case, custom made Teensy based MIDI controller and sell that but the price would probably be too high for a regular sythusiast (I just made this word up :D). So take this article as an inspiration for building your own ‘celestial box’ 😉
MoonBox Features and Specifications
> SunVox (Virtual Modular Music Studio) – the soul of the box, v1.9+ is needed for MIDI knob mapping
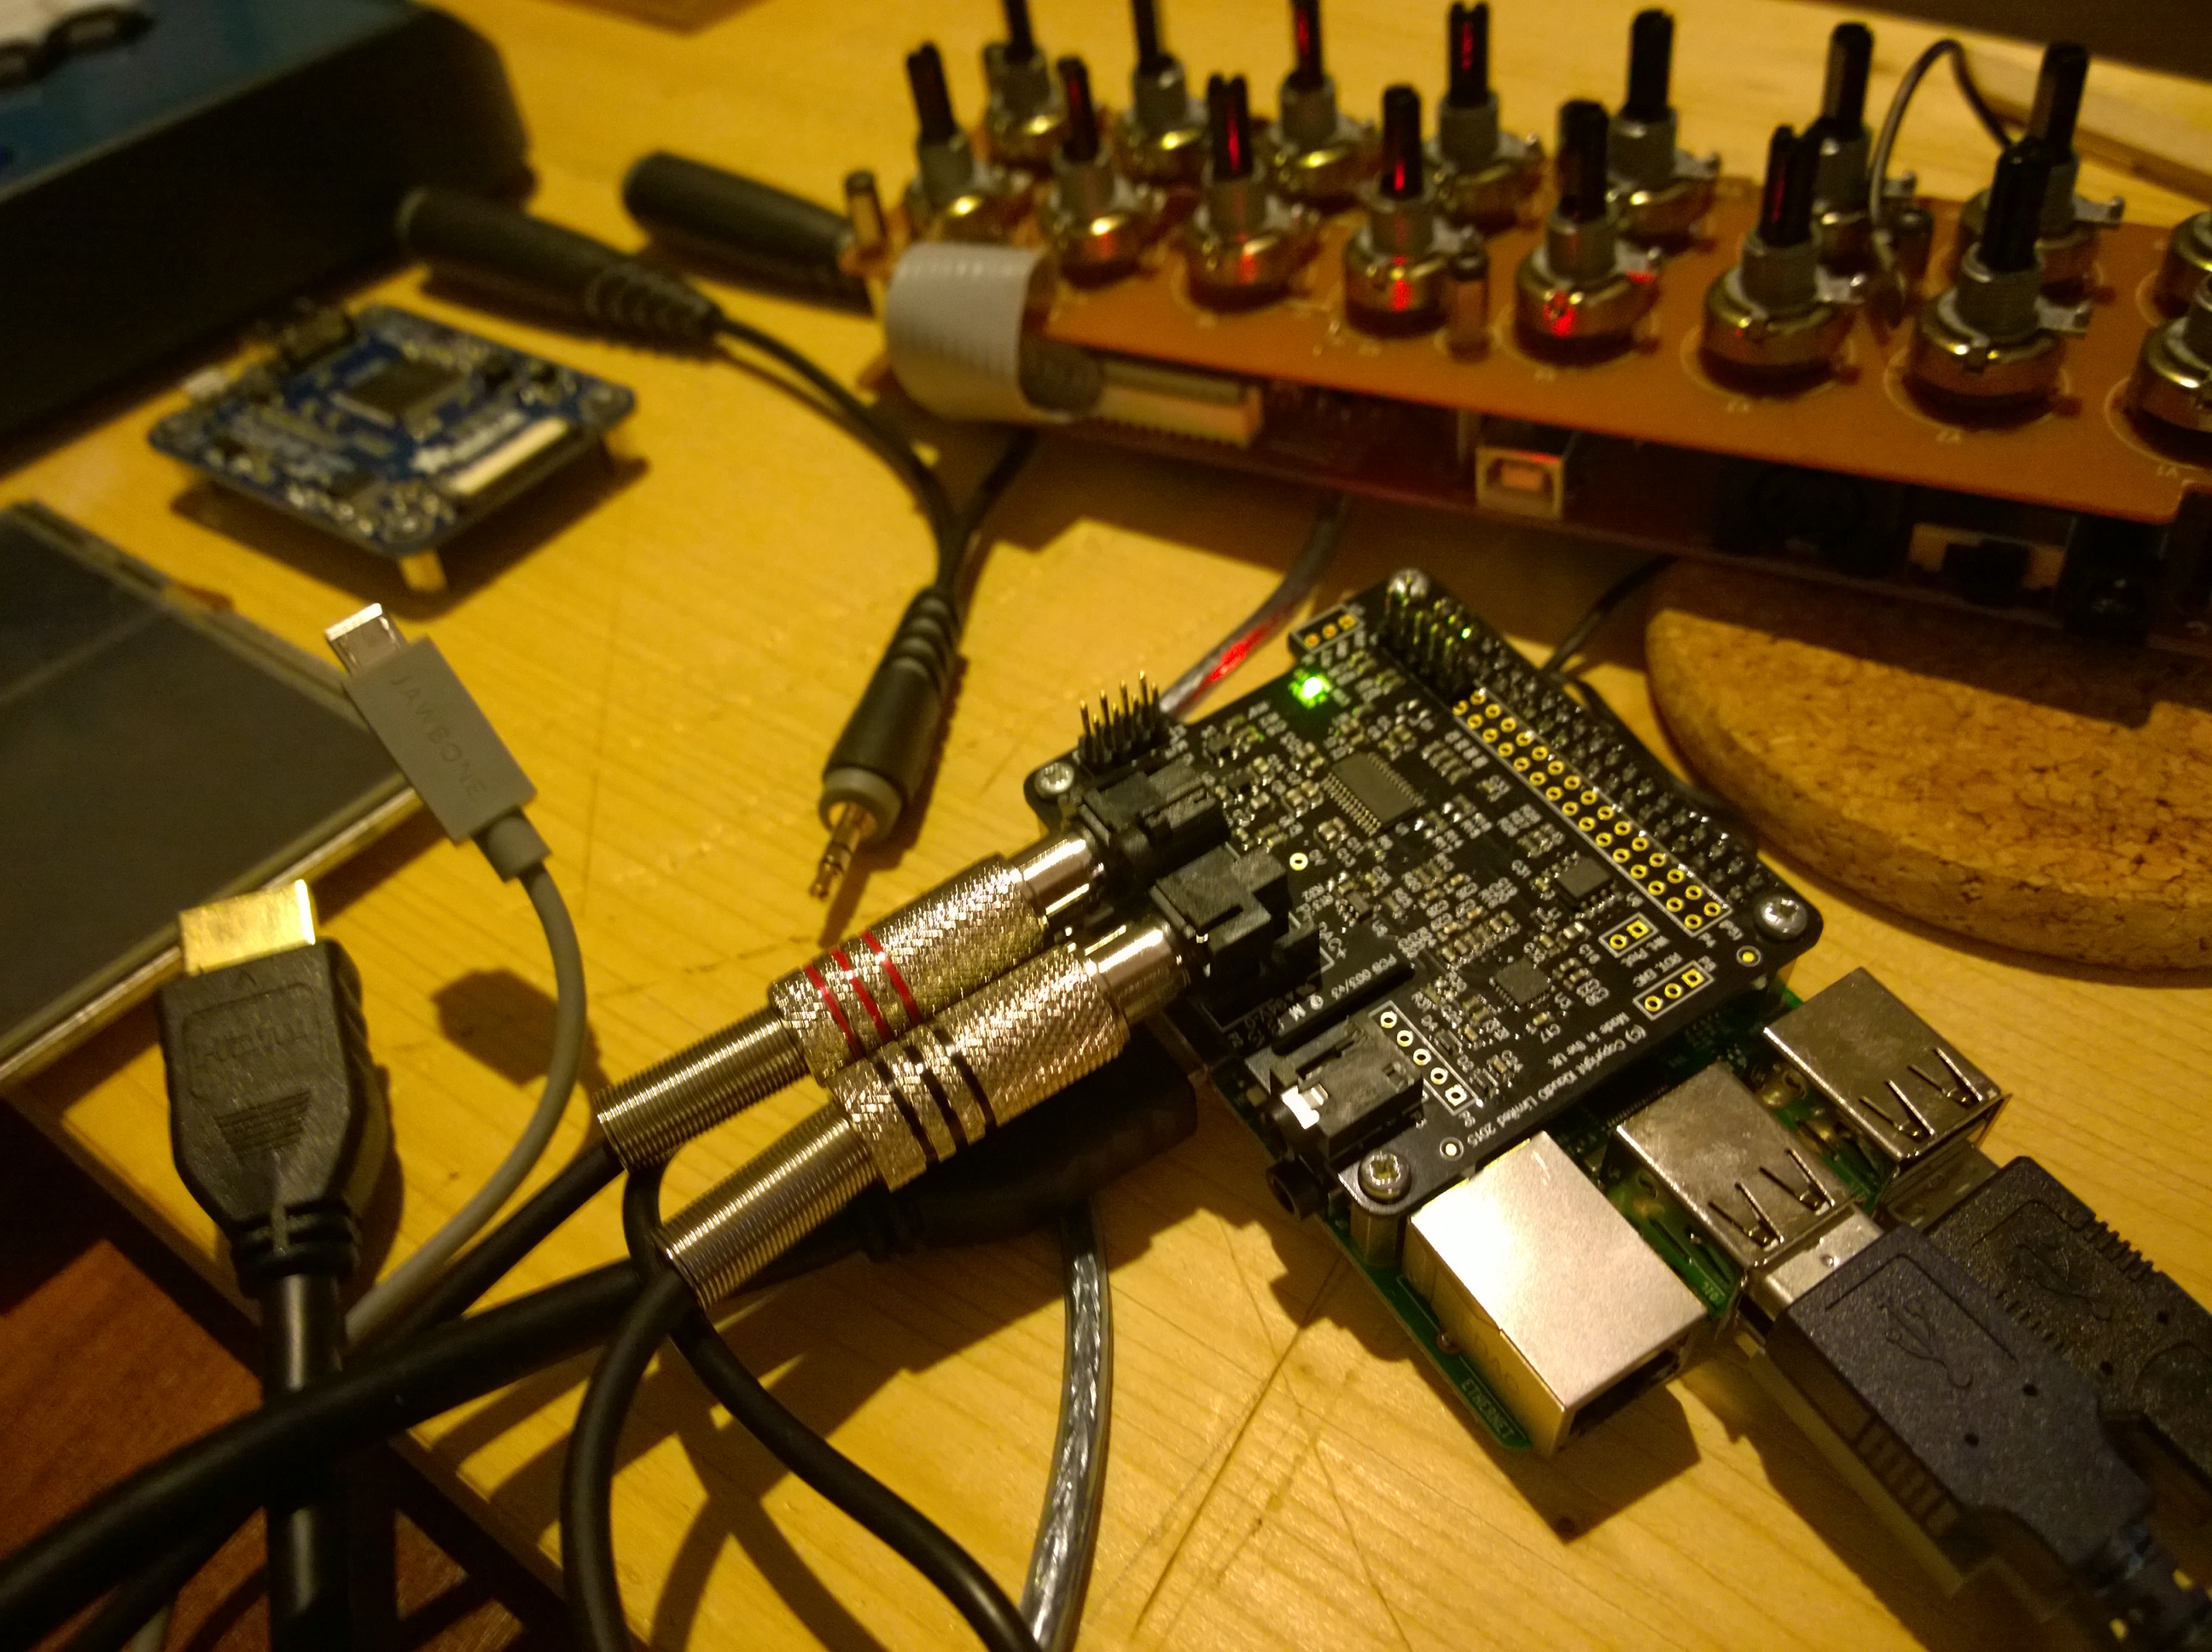
> Raspberry Pi 2 B – the heart and muscles of the box, overclocked 1GHz quad-core, 1GB RAM, 16GB MicroSD card
> IQ Audio Pi-DAC+ – the mouth of the box, full and strong sound
> Raspbian OS – the mind of the box, pre-configured version from IQ Audio with full support of Pi-DAC+
> 5″ 800×480 TFT LCD with touchscreen
> 16 MIDI knobs
> master volume encoder
> 5-DIN MIDI I/O with activity LED’s
> 6.35 mm headphones output
> 6.35 mm L & R audio output
> 1 USB port (free for additional USB hub and peripherals)
> MicroUSB power port with power switch (just to utilize a power adapter I had)

Basic design decisions
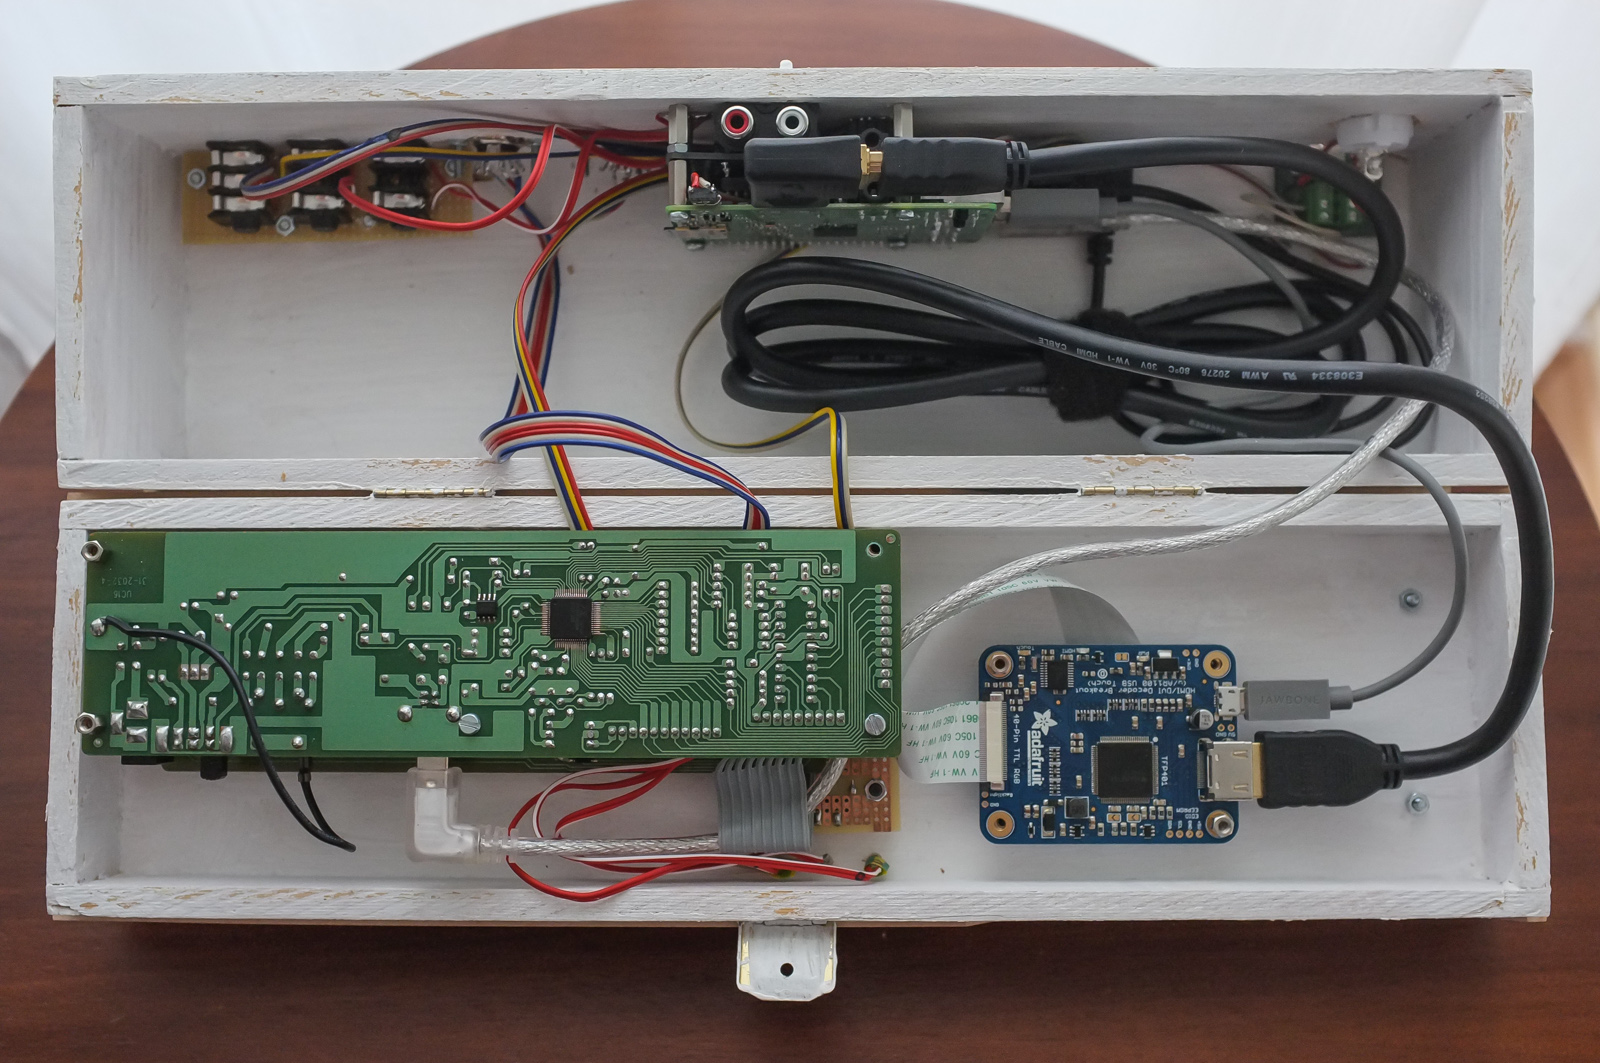
The idea of dedicated SunVox synth box was maturing in my head for quite some time. Actually since the latest Raspberry Pi 2 came out. The RPi version of SunVox was already available. I’m not electro-technically educated so I dismissed the possibility of making my own control surface but customized Teensy based MIDI controller would be viable option. Luckily I had at home the good old Evolution UC-16 laying around unused. Then I looked for the sound card options because I knew the sound was poor on 1st gen RPi’s. The best contender seemed to be the IQ Audio Pi-DAC+ sold also through tindie.com. The customers feedback didn’t lie as I found out later. Then the touchscreen was needed. Adafruit’s 5″ LCD was the clear choice because of the simple connections and the size fitting into 3U rack height that I took as a maximum dimension constraints. Originally I wanted to have something in Roland’s desktop V-Synth form factor, including the handles 🙂
Case considerations
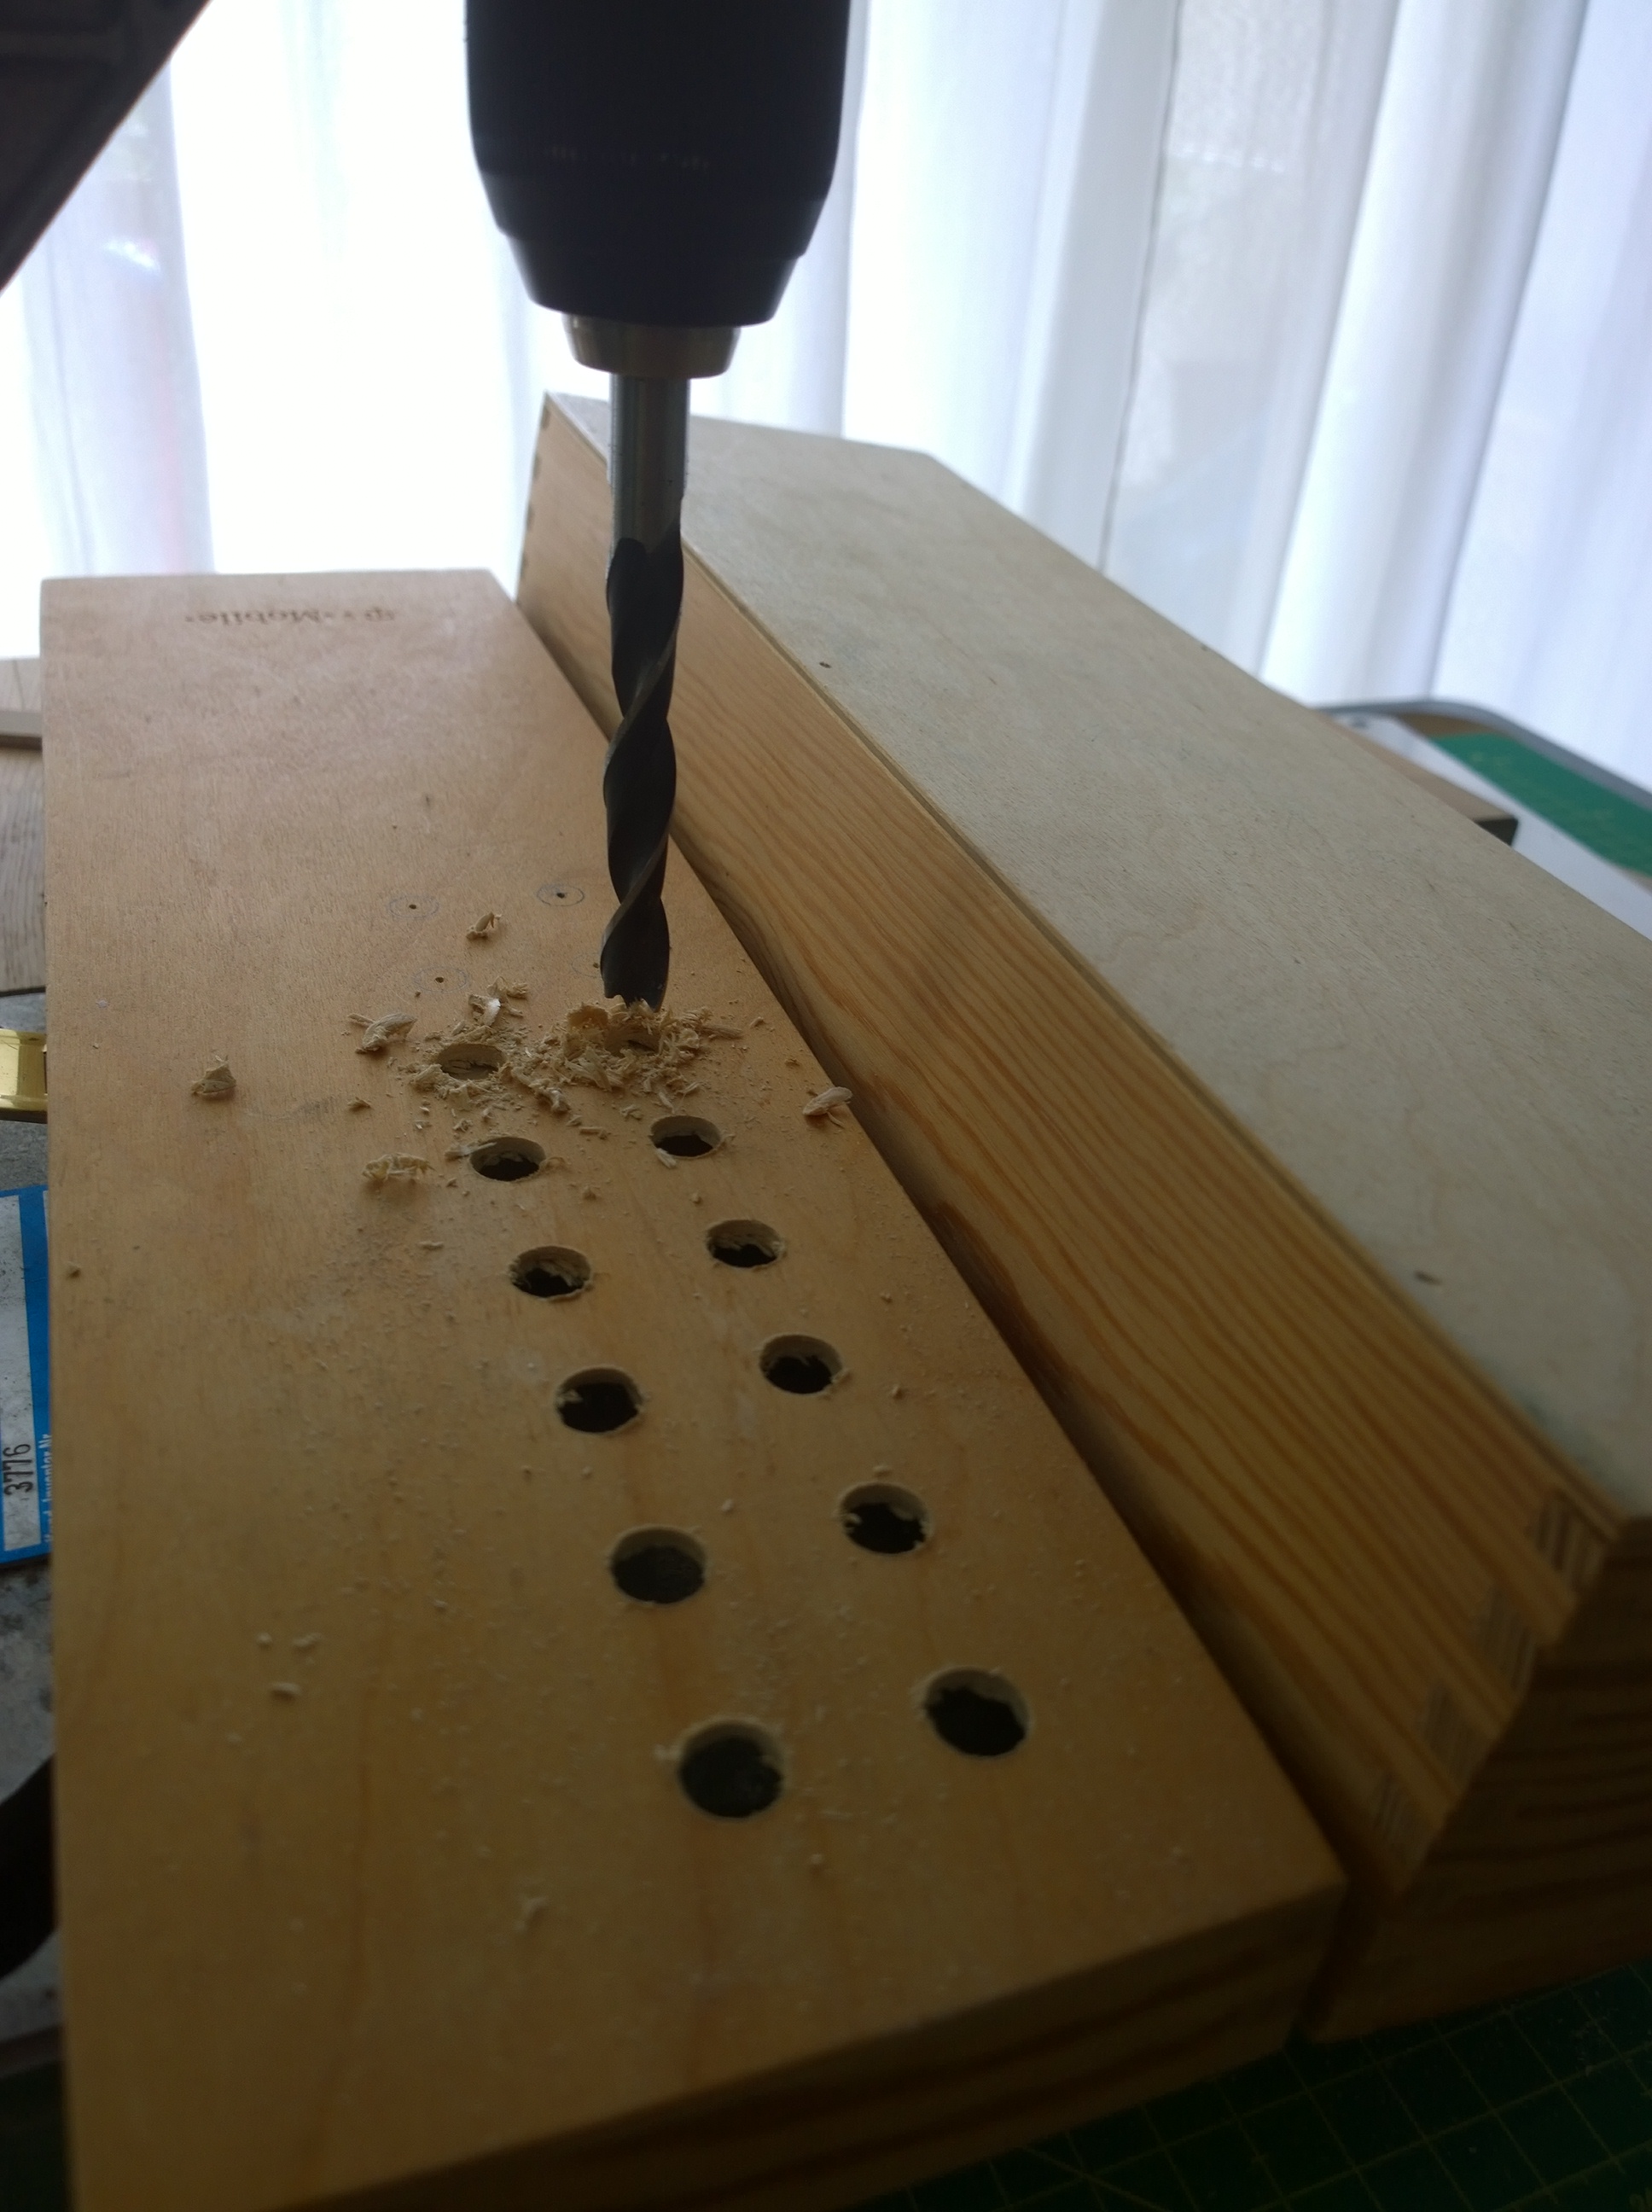
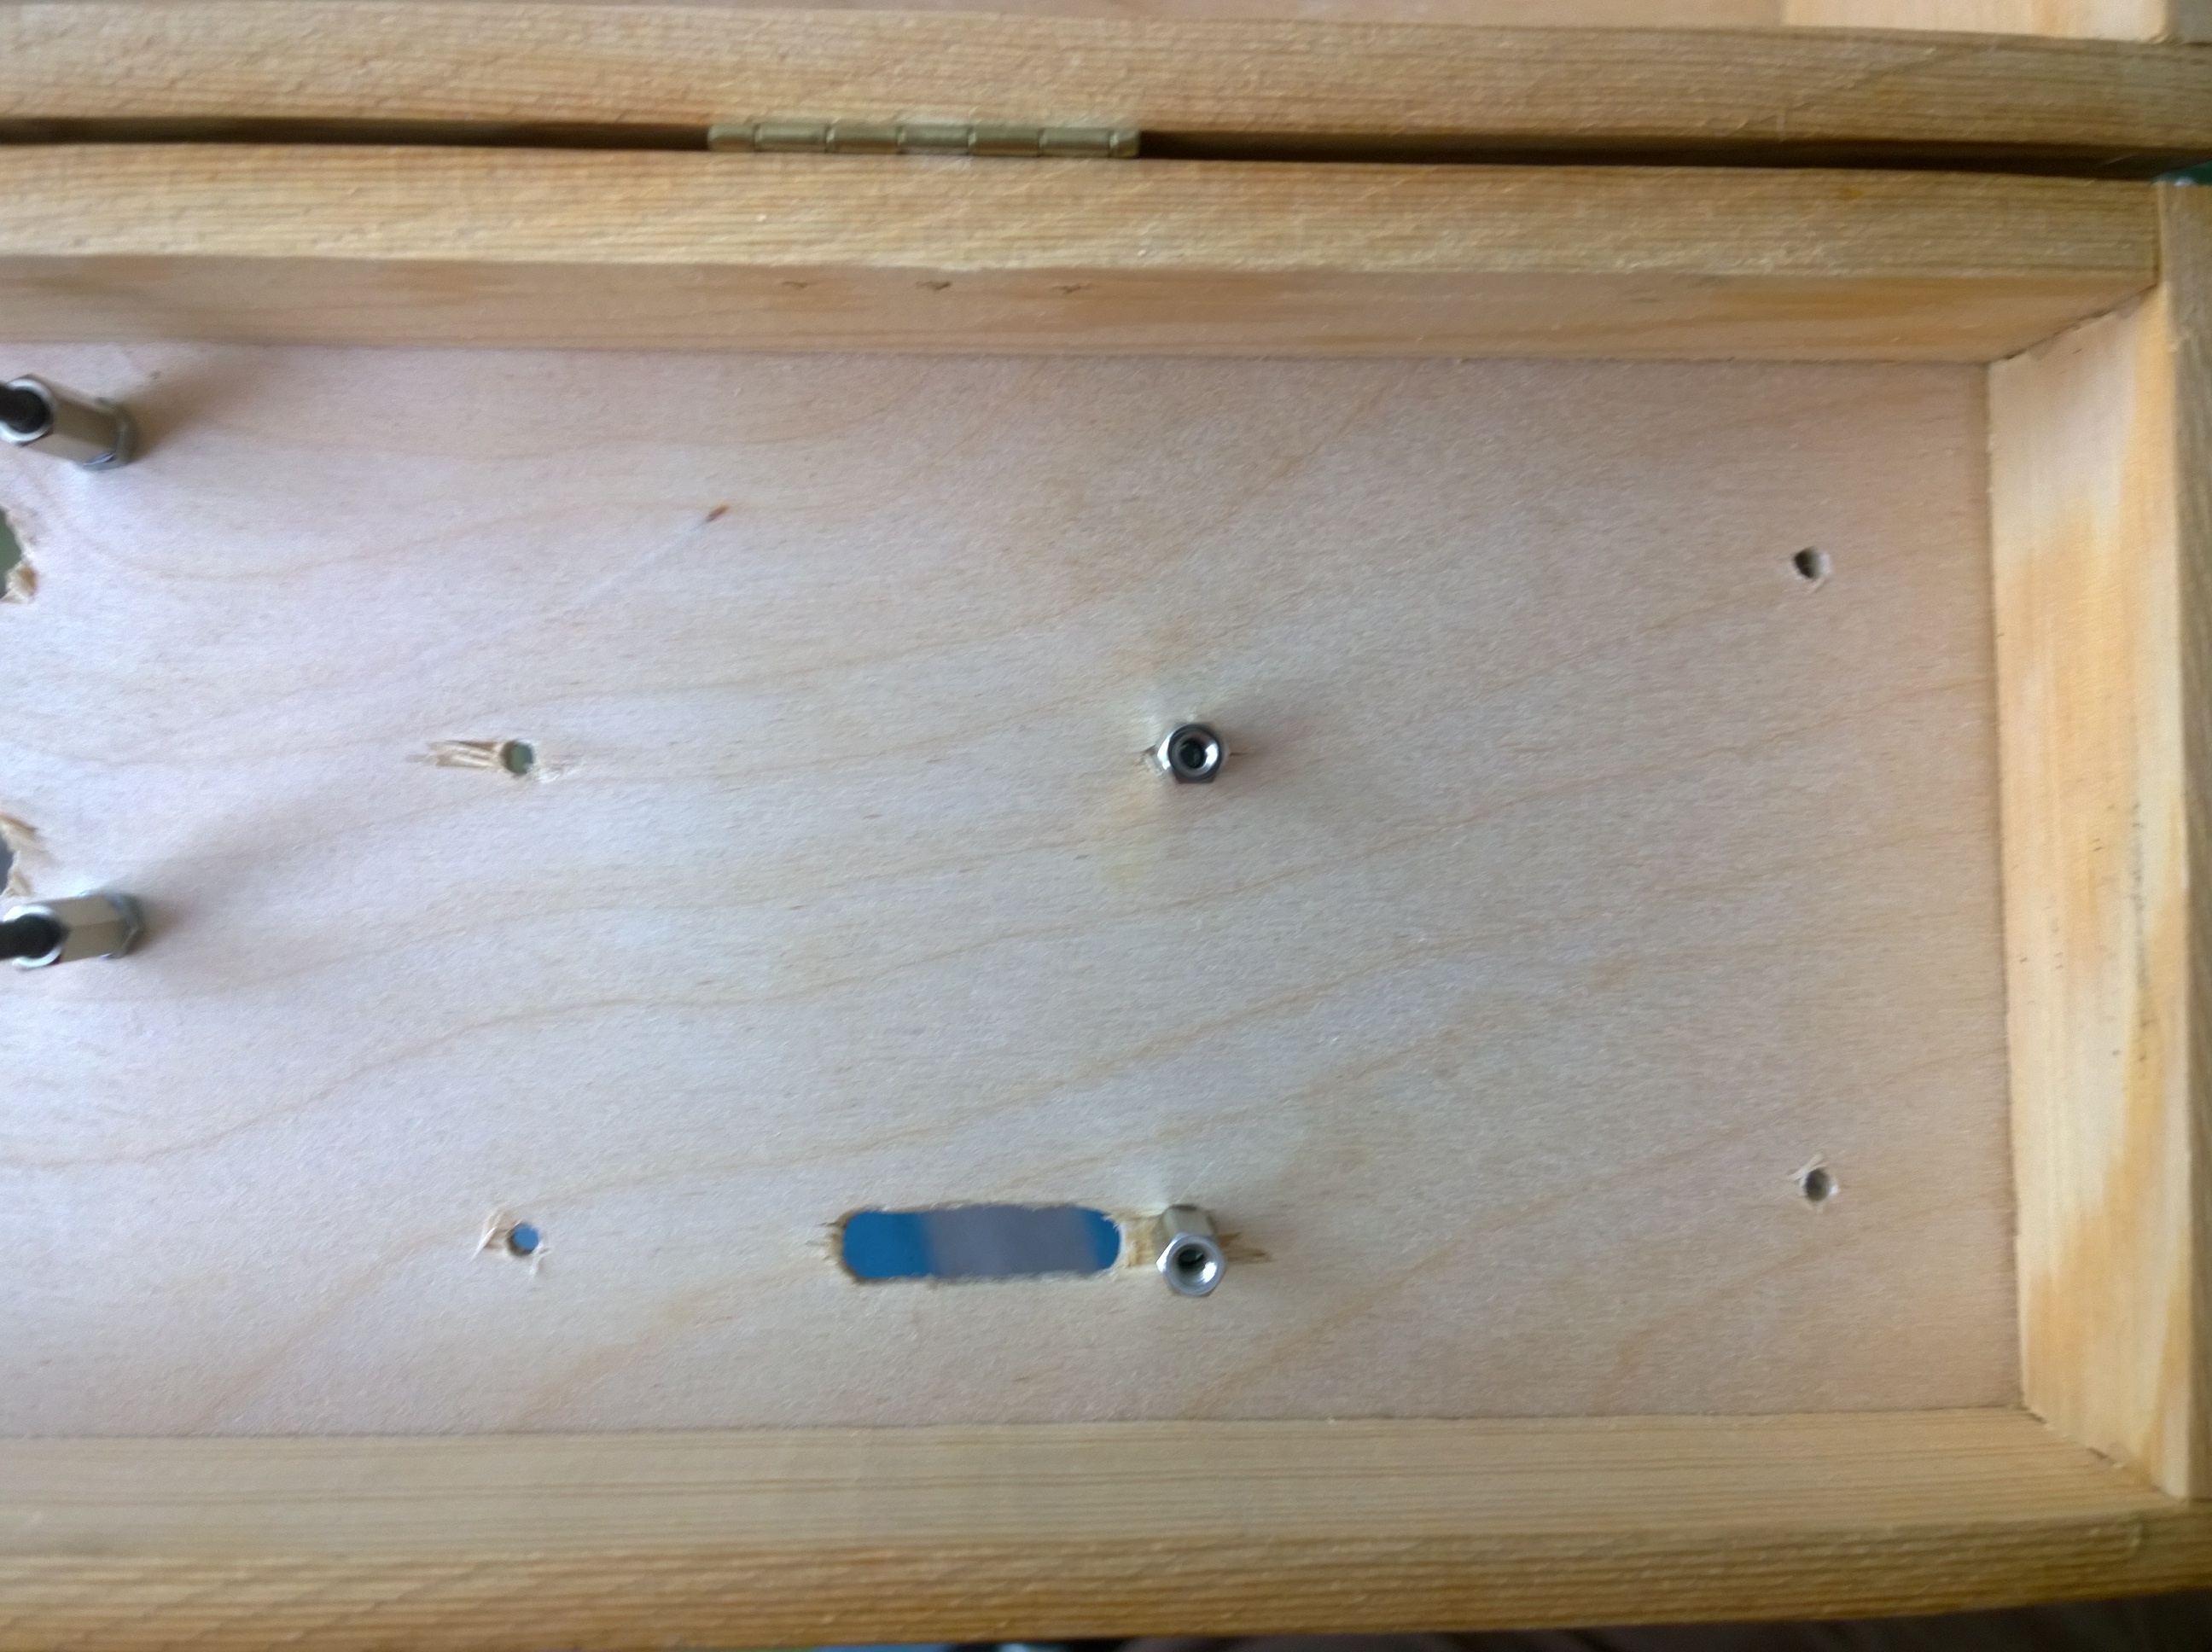
I’ve started designing a custom made case to be laser-cut from MFD. It was taking too much time and effort to transfer all the building blocks into 3D and I already knew that there will be a lot of unforeseen design surprises when it comes to fitting all parts together. So I took a DIY route. Checked all the boxes I’ve found in the cellar. A wine bottle box for the win! It had tilt-able front panel, dimensions seemed to be perfect. It’s plywood is on the softer side of the spectrum but not completely fragile and it’s easy to drill to. General woodworkers rule of thumb – it’s easier to drill a hole than cut out a rectangle.
LCD with Touchscreen
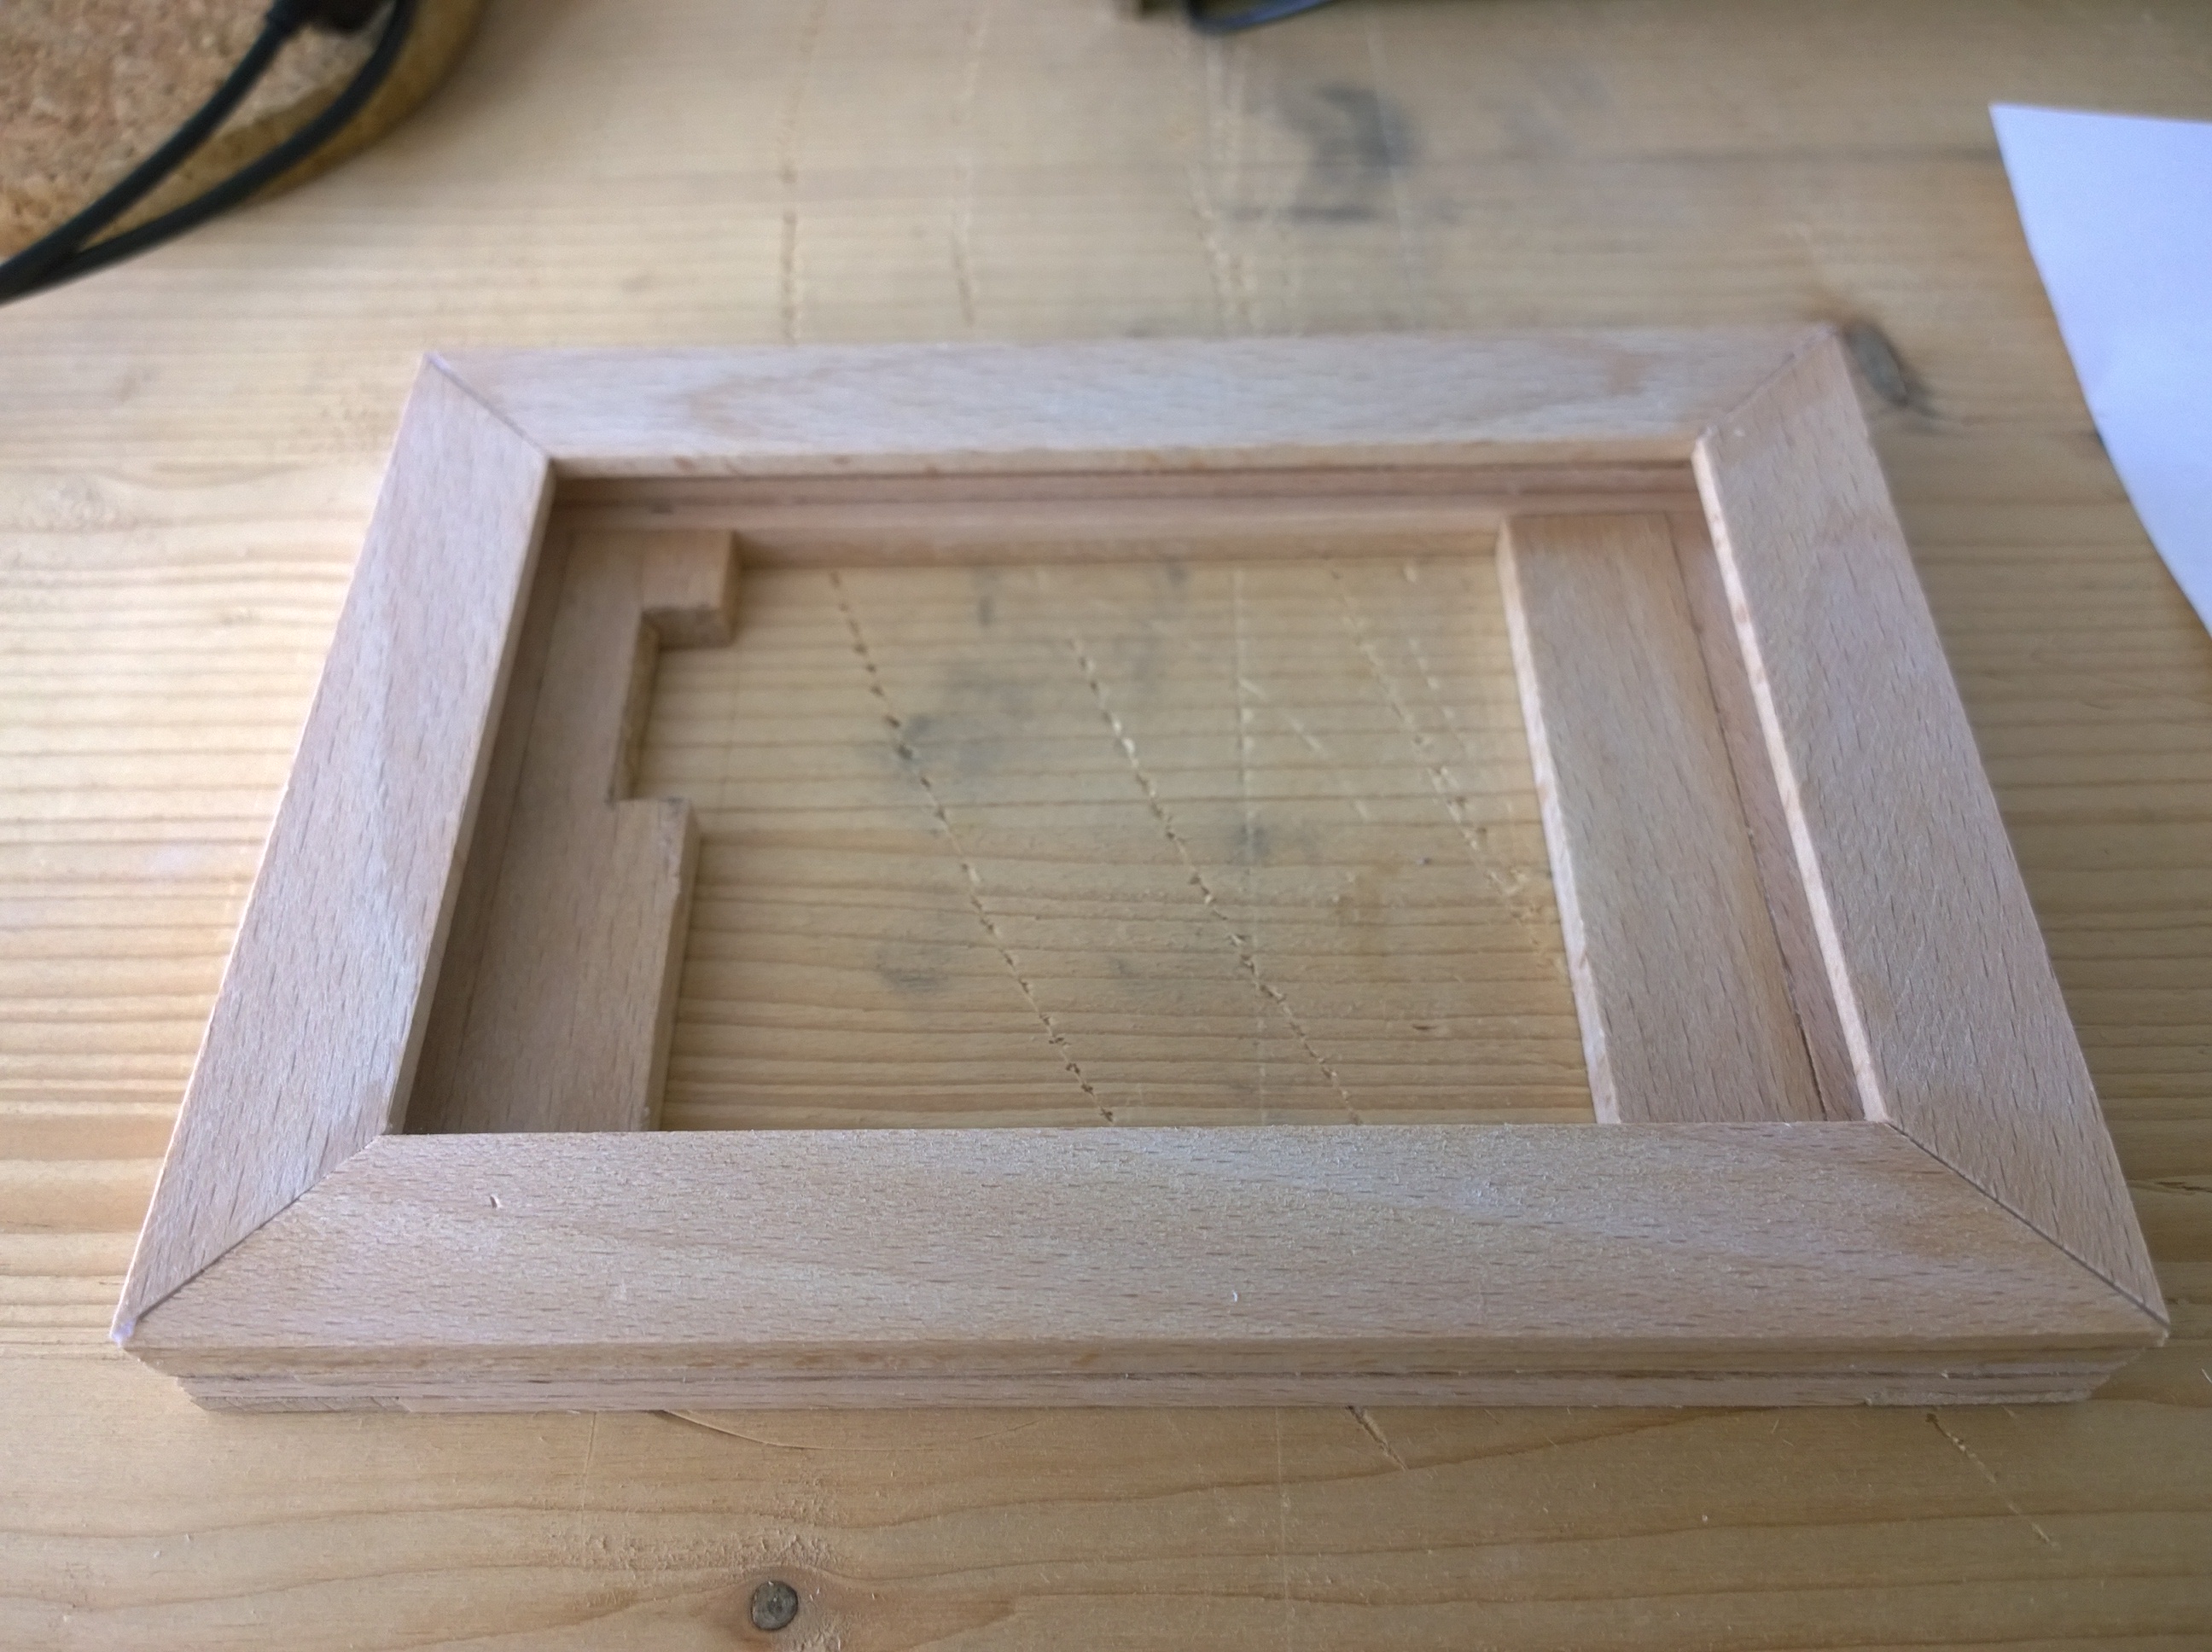
That led to the decision of placing a LCD ‘outside’ the box. It could rest this way on the body of the box. But that required to design a detachable frame. I happened to have a bag of small hard wooden planks (b-stock material from folding ruler factory) that I used in other projects already. So I just sat down, measured everything and made the tight fitting frame consisting of two layers, both mountable with screws. Bottom one holds on the box and two screws are also used to mount the LCD converter board on the inner side. This frame has also two self-adhesive soft padding black stripes so the LCD is not hard-pressed towards the bottom. Top frame layer is mounted with screws to the lower frame layer. LCD has a small circuit on plastic foil and 40pin connector, both are fitting into this outer LCD frame. There is wider hole for the 40pin flat cable that goes inside the case where it’s connected to the LCD/touchscreen converter board.
Connection is quite simple. LCD is connected via aforementioned 40pin extension flat cable to the Adafruit converter which is connected to RPi via USB (transmits power and touch data) and HDMI (receives video signal). Unfortunately the HDMI cable prevents the MoonBox to be fully closed. For transportation I have to unplug the HDMI cable from the RPi, then it’s possible to close it.
Display must be configured in the Raspberry /boot/config.txt file. These are the important lines that has to be added/changed:
# uncomment if hdmi display is not detected and composite is being output
hdmi_force_hotplug=1

# uncomment to force a specific HDMI mode (here we are forcing 800x480!)
hdmi_group=2
hdmi_mode=1
hdmi_mode=87
hdmi_cvt 800 480 60 6 0 0 0

max_usb_current=1
Full article on LCD configuration can be found on Adafruit’s site.
UPDATE: Since November 2015 you can get a really nice 7″ touchscreen produced by Raspberry Pi Foundation. In the end it’s cheaper, bigger, with more responsive touch layer, has mounting holes and needs zero configuration when you use the latest OS images. And it’s connected just by thin flat cable and a pair of power wires to the RPi mother-board. No cable mess.
I’m already using it in another RPi synth project (this time with extra twist, stay tuned). A must have for anyone interesting in building this.
MIDI knobs
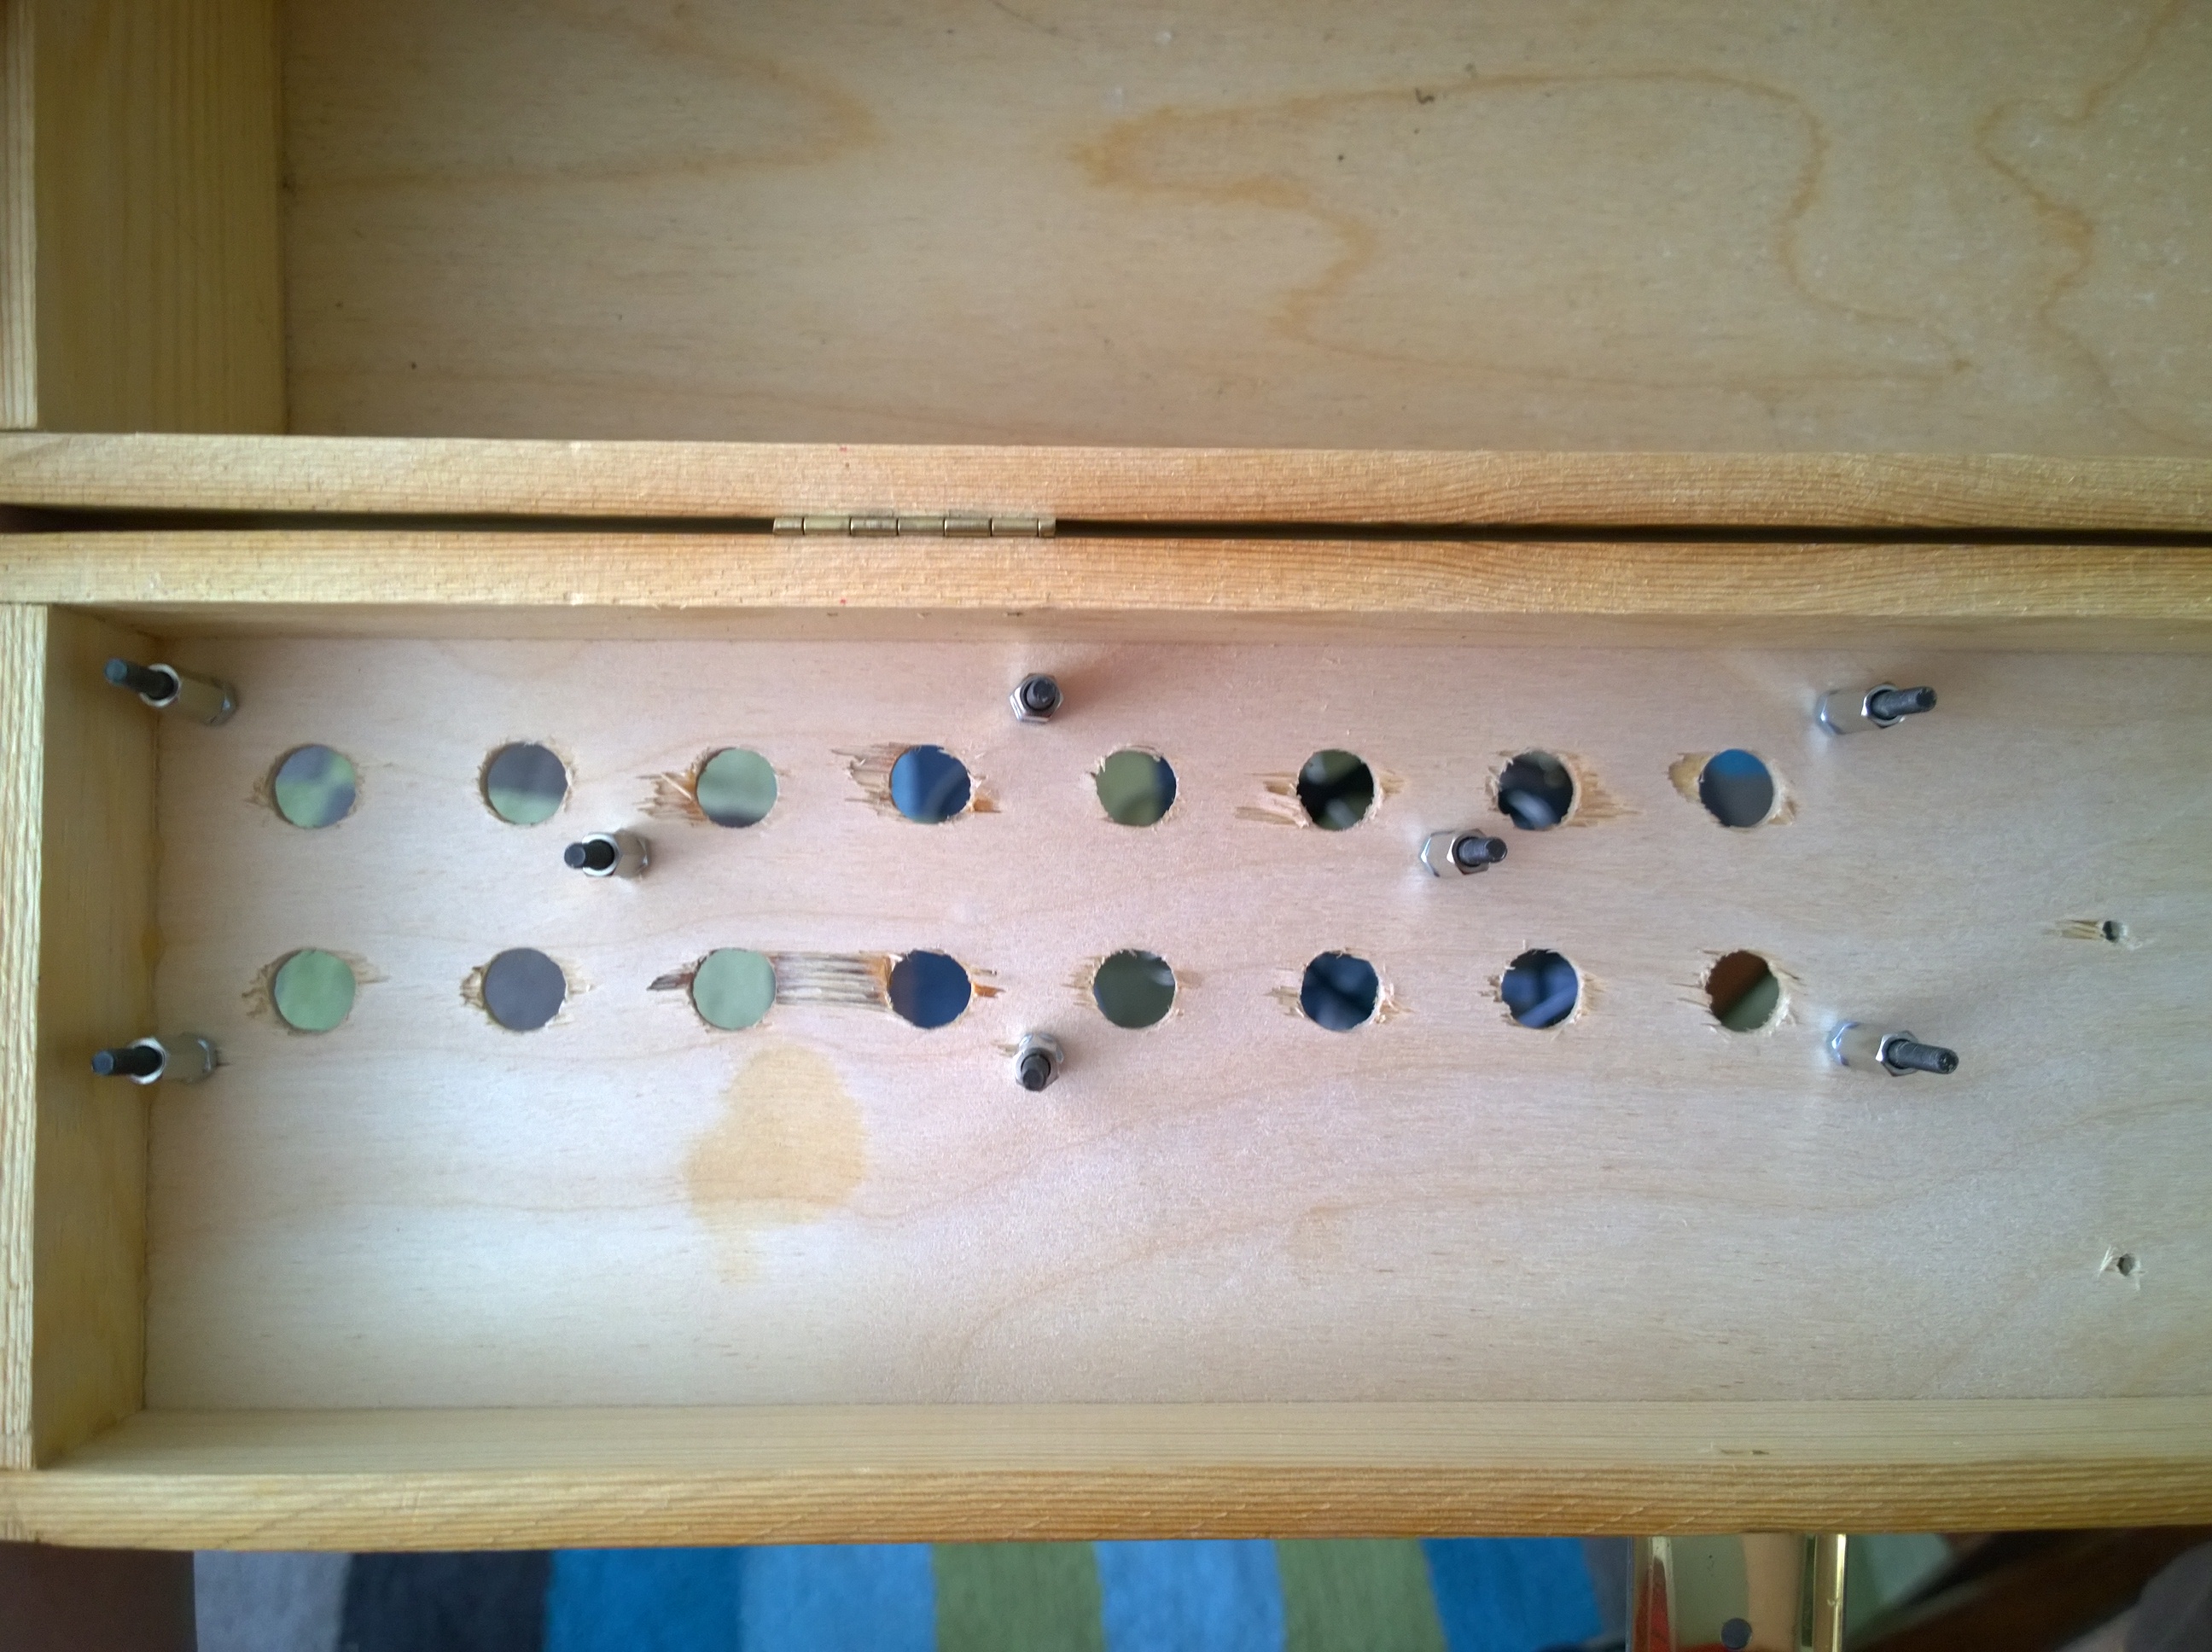
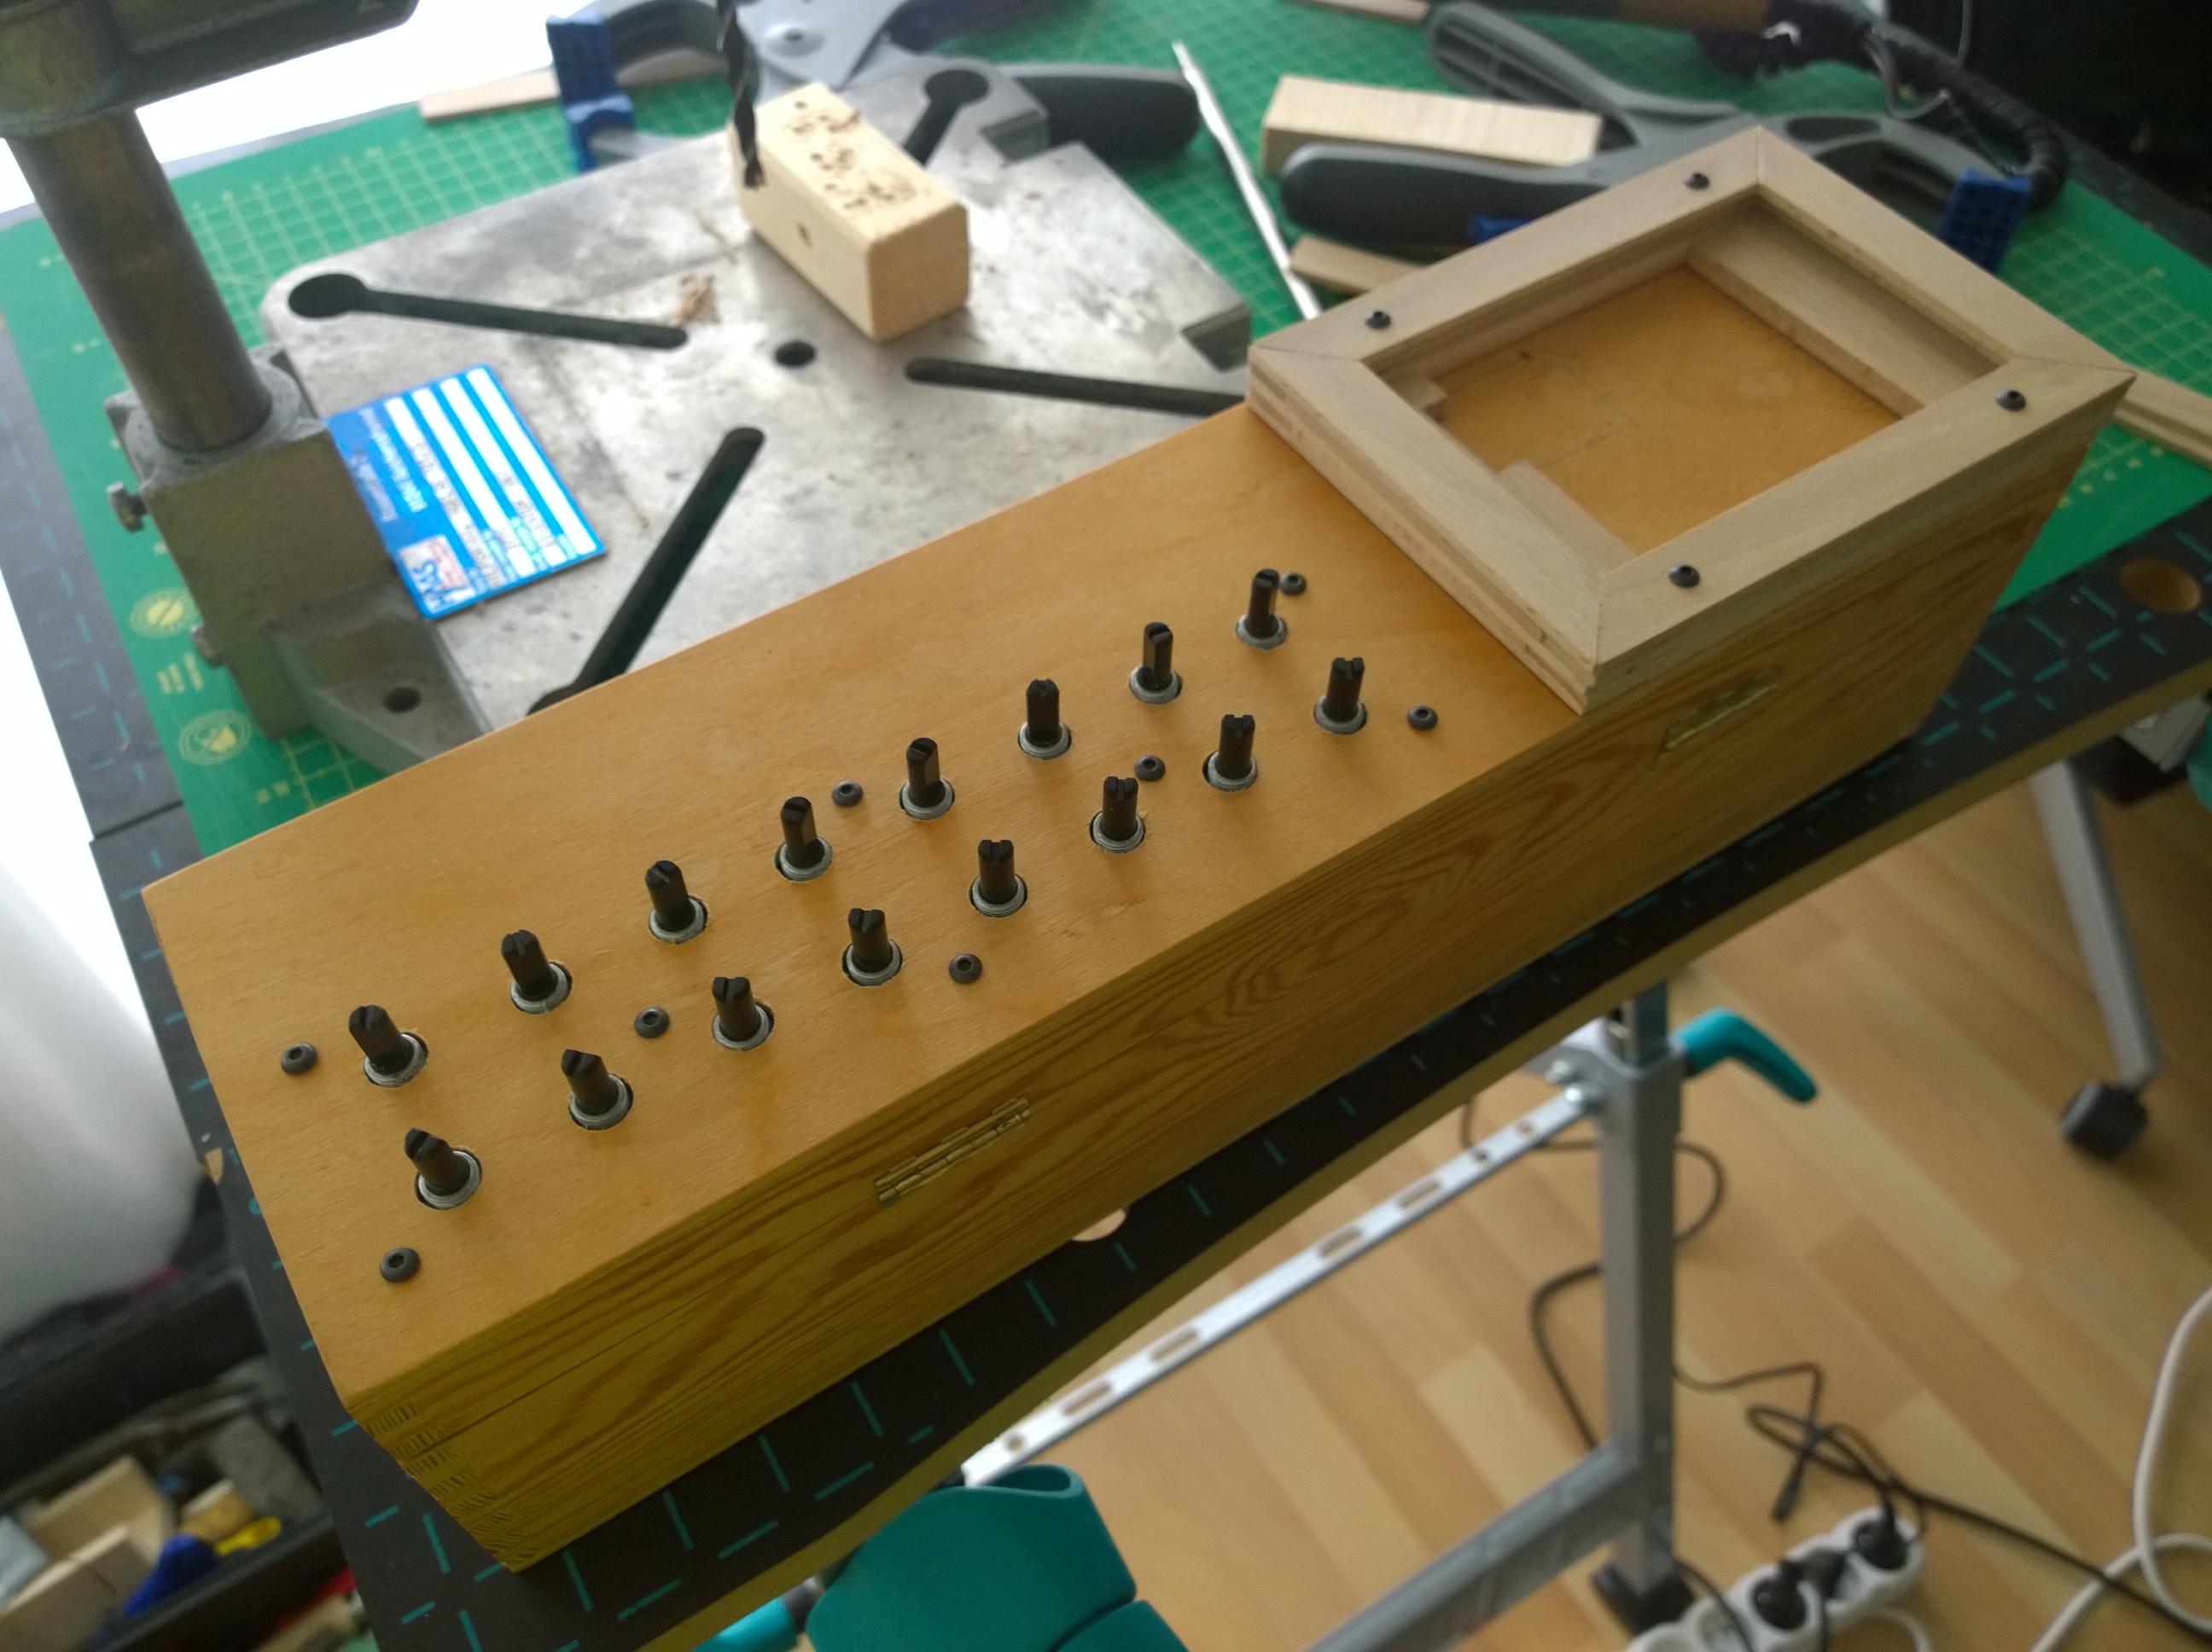
Essential part of the design was having tangible control over the module parameters of SunVox (MIDI learn feature is present from v1.9). I re-purposed an old and unused Evolution UC-16 MIDI controller for that. It showed up that it’s possible to use only the main and control board, without the button pad board and display. Good, less space needed in the MoonBox.
Important thing was to set UC-16 to the preset which sends MIDI CC’s on one channel before the button pad gets detached. One channel transmission fits better to SunVox MIDI controller mapping scheme.
Another tricky part was to transfer the pot and mounting holes onto the case. A lot of quadruple measuring and comparing the dimensions but it went out relatively OK.
UC-16 torso is sandwich-mounted to the front panel from the inside and is connected to the RPi by USB cable. Later I’ve added a right-angled and shorter one.

MIDI I/O
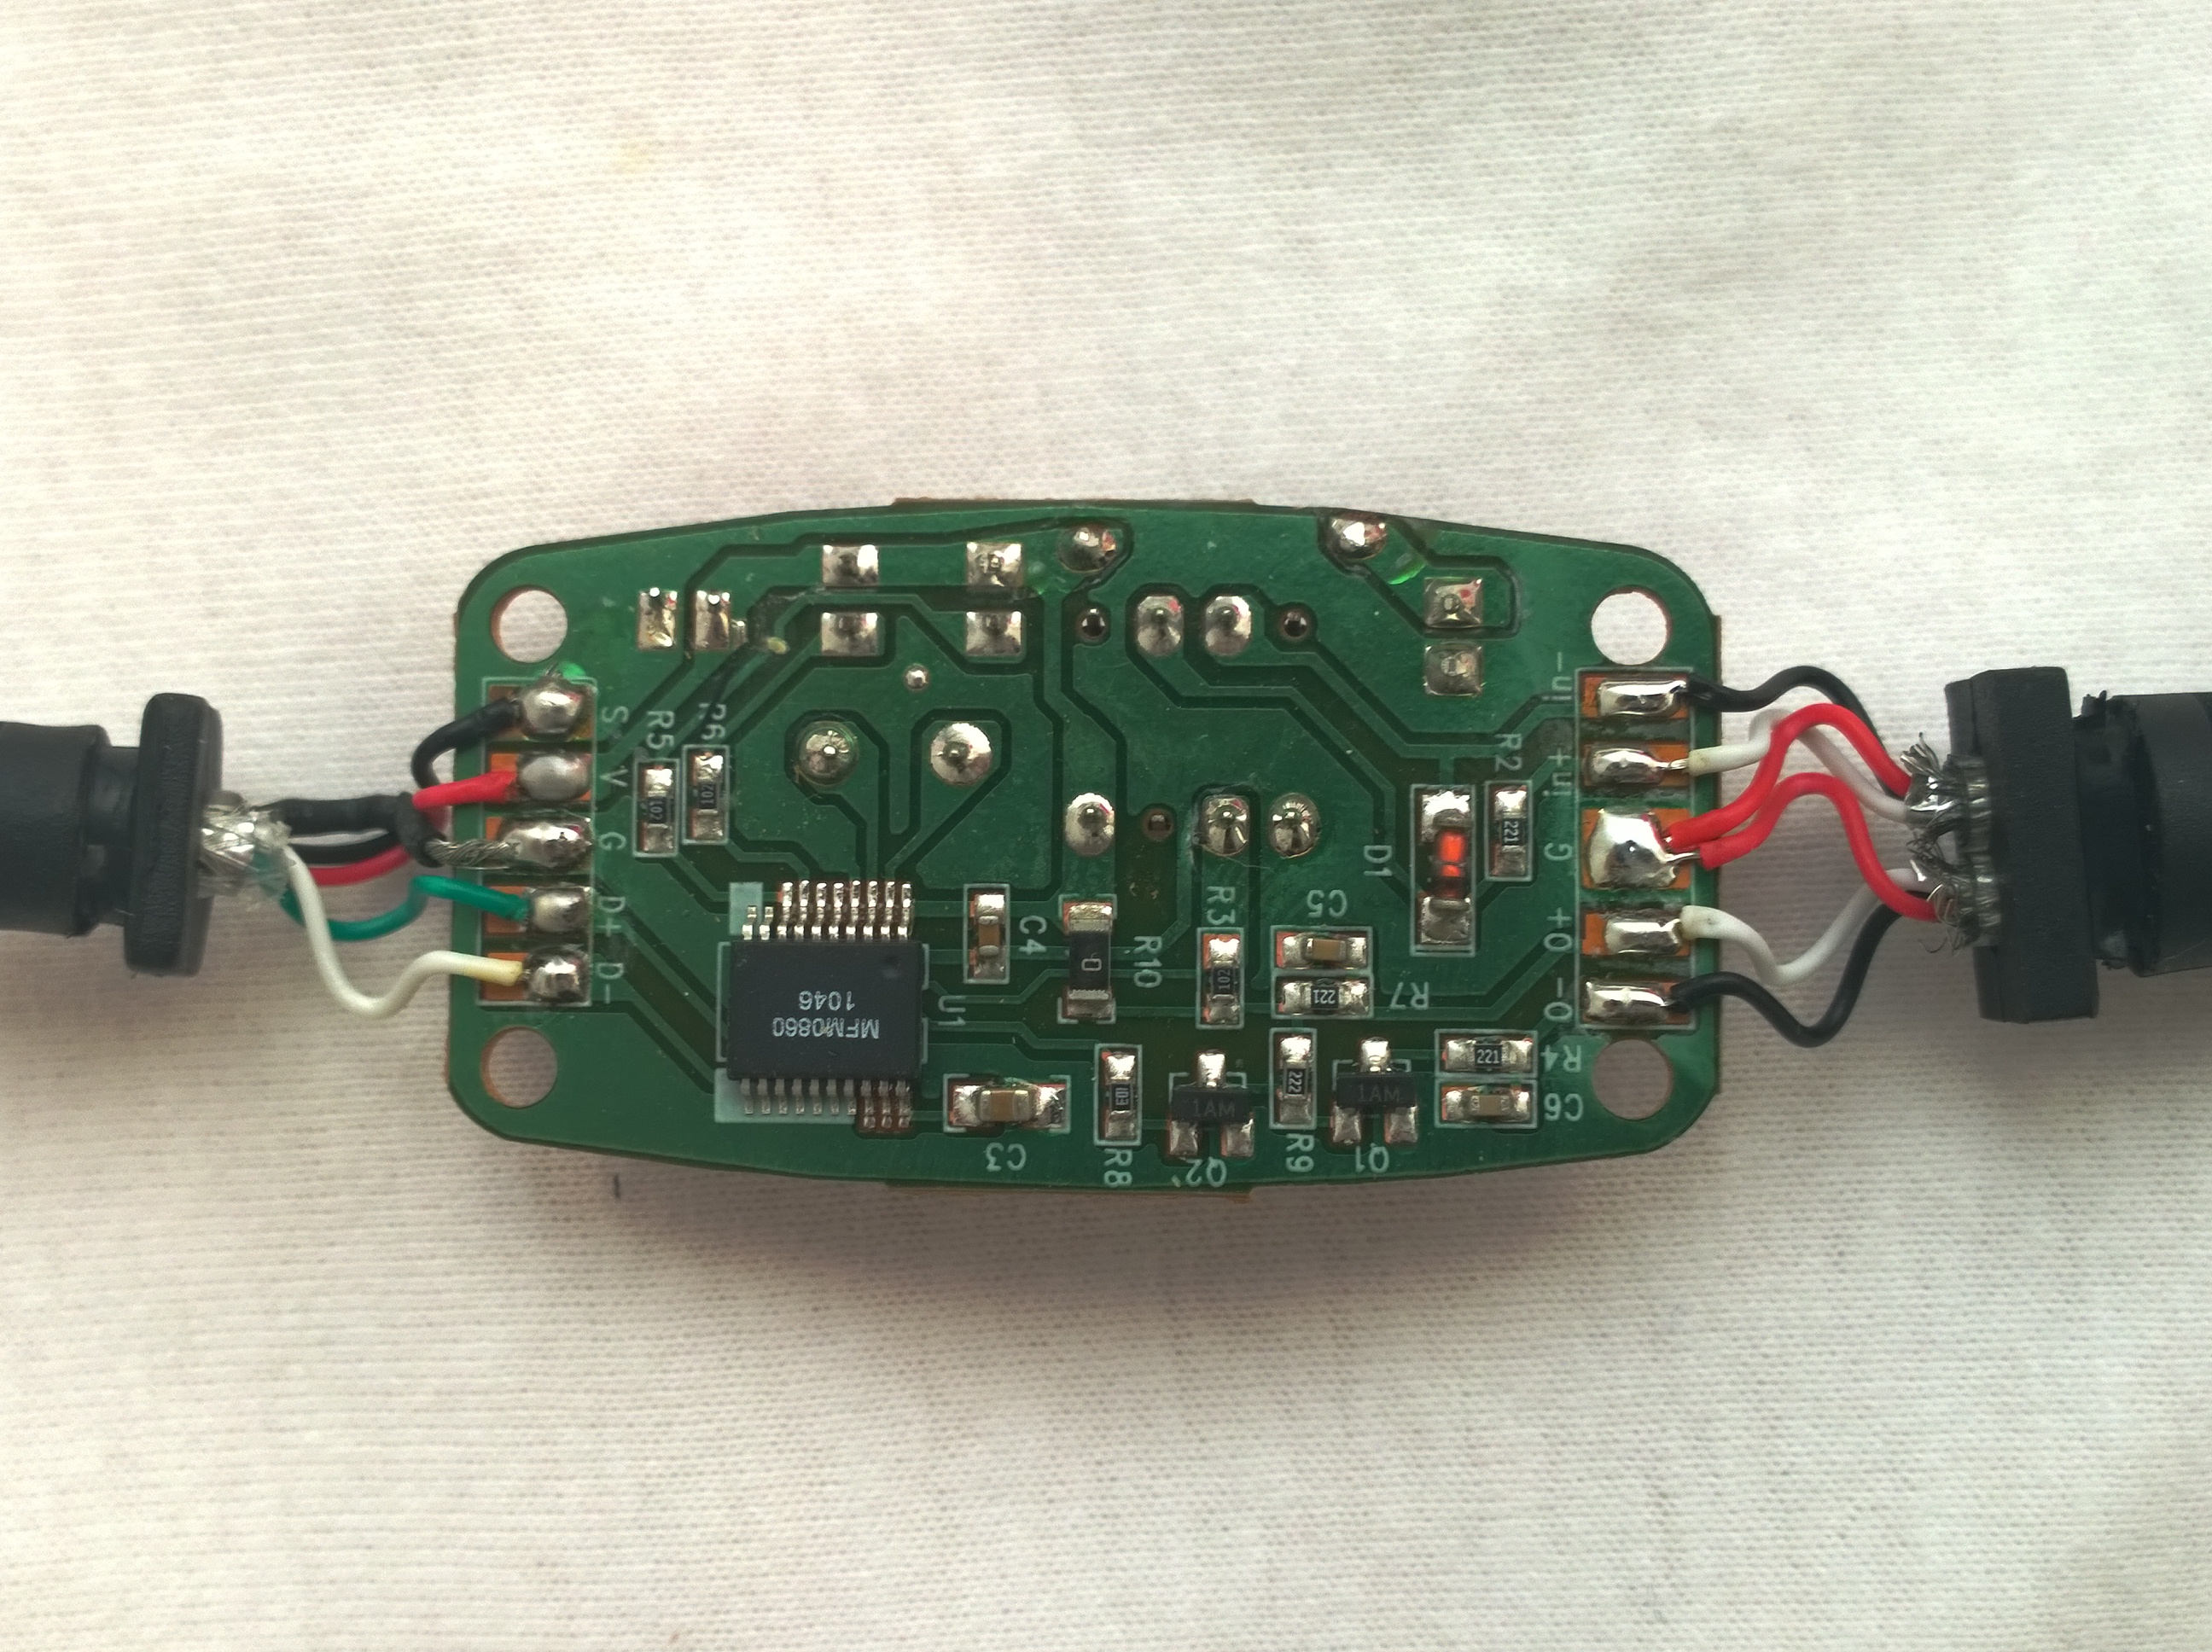
For the MIDI Input/Output I’ve just stripped down the cheap USB MIDI interface. It’s practically a small circuit board on the cable. Two MIDI 5-DIN cables on one side, USB on the other. Both, USB connector and 5-DIN MIDI I/O connectors were custom-wired to shorten the cables and get a female MIDI sockets onto the back of the MoonBox. I/O activity LED’s were de-soldered from the circuit board and put on wires to get them to the front panel. USB is connected to RPi.
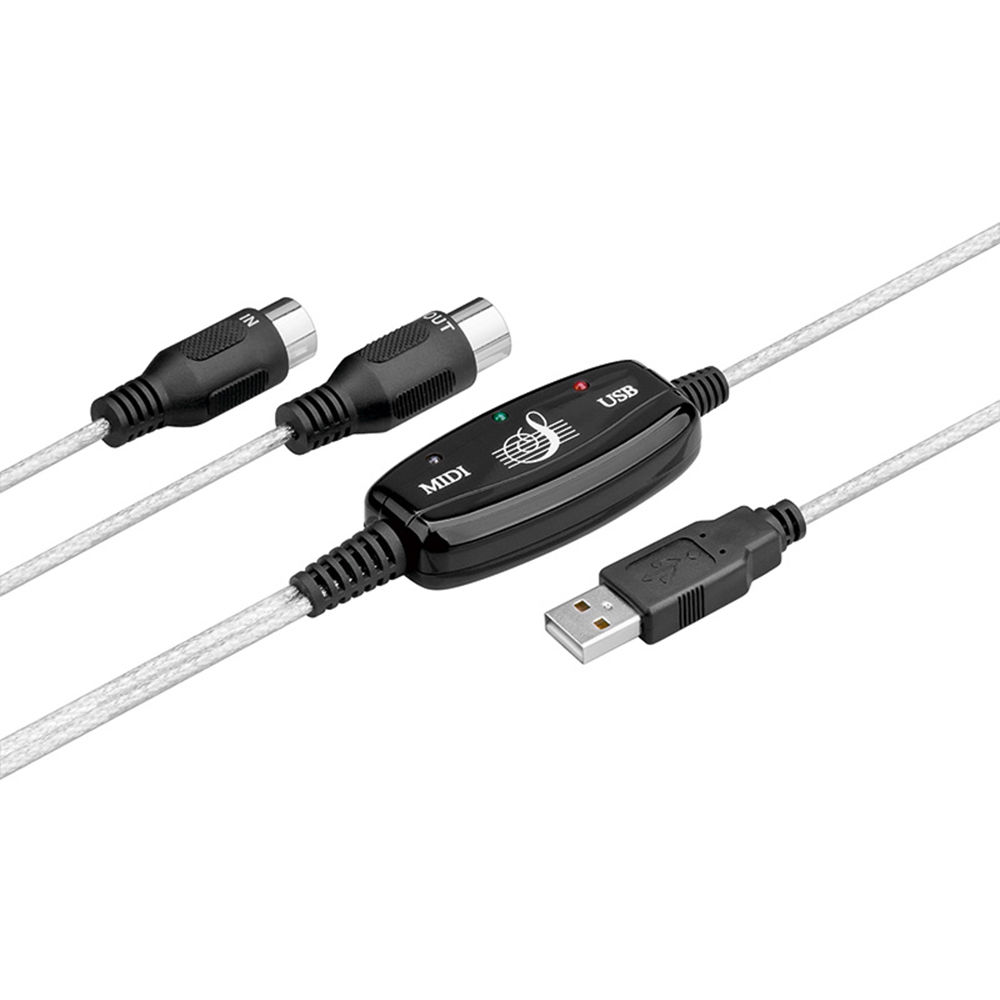
There is much better solution although more pricey compared to cheap USB MIDI but it’s much more sophisticated and it’s mount ready + gives you two MIDI interfaces. One USB and classical trio of 5-DIN MIDI IN/OUT/THRU ports. So your SunVox synth can be connected also via USB i.e. to your PC and act as a USB device. It’s called USBmidi2 and it’s a project of Lauri Koponen. If you are interested in this ready-to-use component just try to e-mail Lauri (go to his website for e-mail address) and ask him for availability. He’s a nice and friendly guy. Price was around 40 EUR including shipping within EU. He’s also working on more advanced version with 4×4 ports. I’ll use the USBmidi2 in another project.
DAC and audio connections
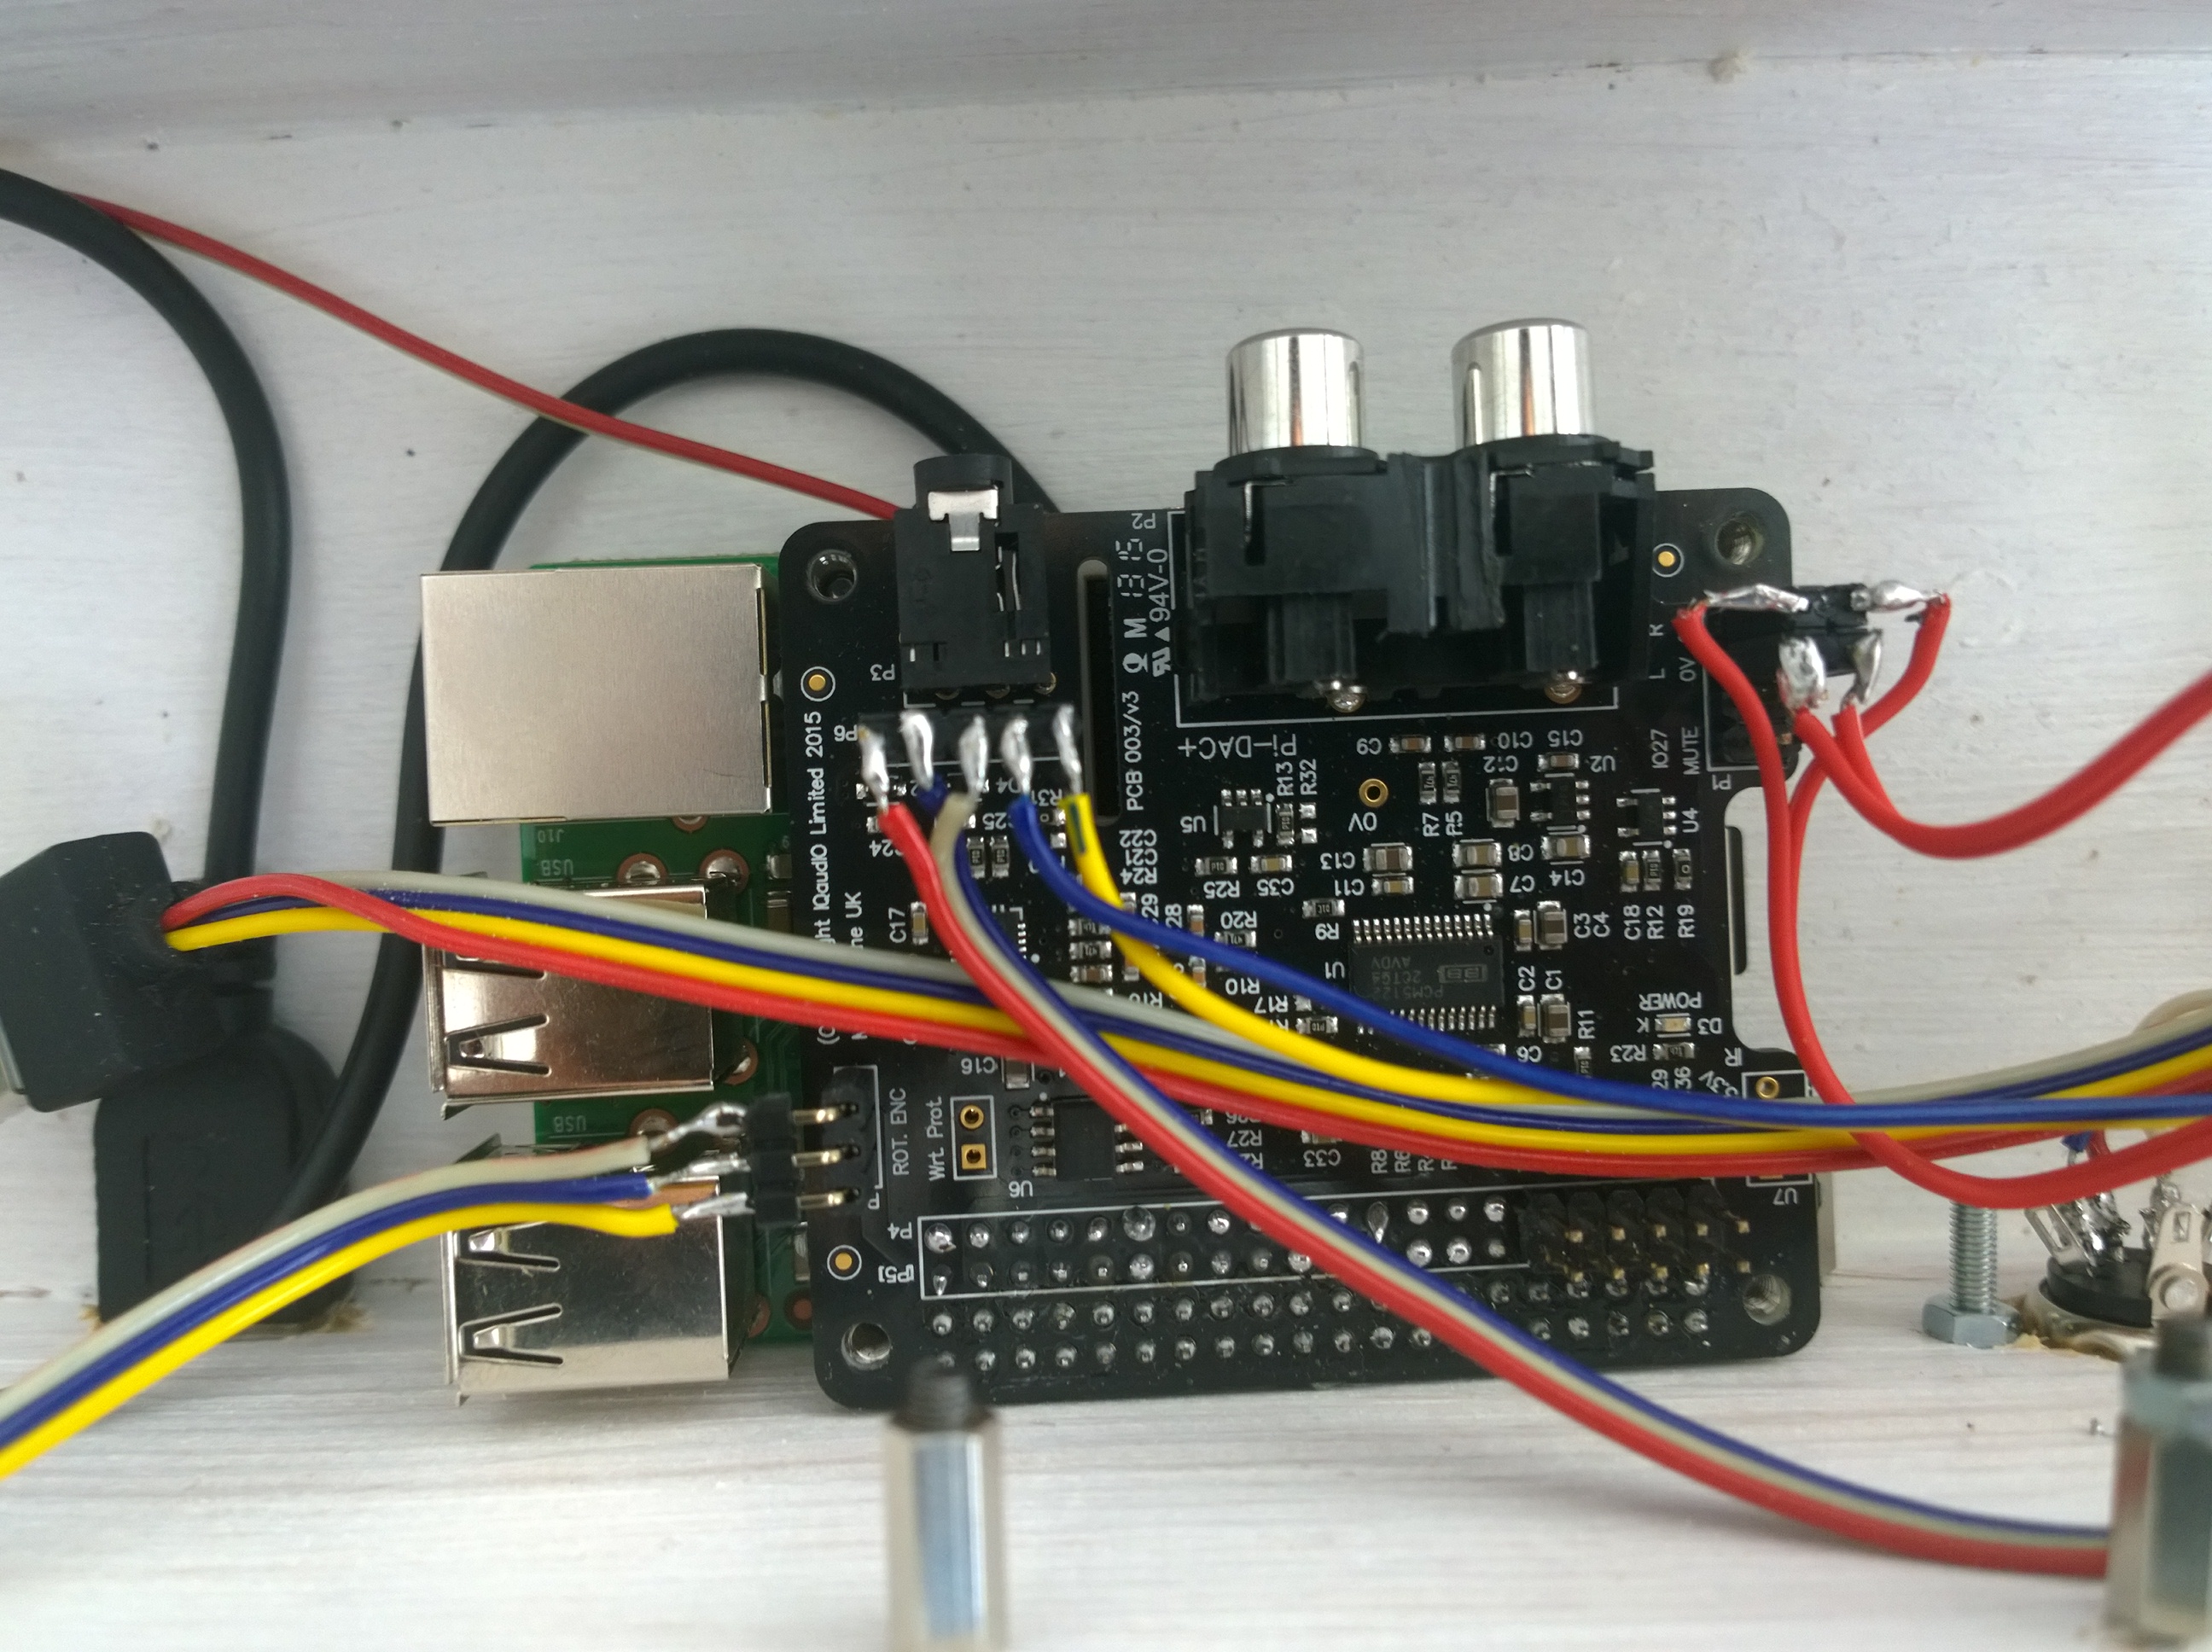
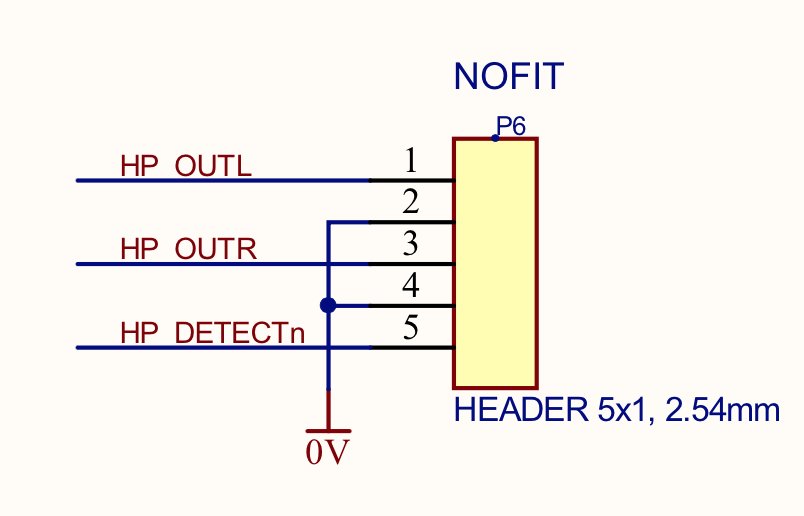
As mentioned before, sound card used is the awesome Pi-DAC+ by IQ Audio. I simply can’t praise it enough. The sound it gives to RPi is full, clean and signal is strong. Even the headphone output is bold enough to feed the hungrier headphones. Most importantly it has pin outs for master volume knob, L&R output and dedicated headphone output. But you could easily use the existing on-board cinch connectors and a small headphone socket. Connecting the big 6,3 mm jack sockets is quite straightforward as the pins are well described on the circuit board. Headphone jack was a bit trickier with it’s 5 pins on the board. I couldn’t find the details in the official documentation. So I simply asked Gordon (the Pi-DAC+ author) via tindie.com where I bought the Pi-DAC+ and he promptly provided me with the scheme of the headphone pin out. Great support for the great product! Audio jacks are placed on prototyping board which is mounted to the case. I’ve also soldered the replicated GPIO pin outs to the Pi-DAC+ just in case I’ll ever need them. Pi-DAC+ is sitting on top of the Raspberry Pi 2, mounted with supplied stand-off’s.
Raspberry Pi
And finally the RPi 2. I’ve used the OS image supplied by IQ Audio (namely the 2015-02-16 Raspbian Wheezy image) as it gives direct support for the master volume knob, no need for additional configuration. And my subjective feeling is that it gives slightly better latency than the official stock Raspbian which btw works nicely with Pi-DAC+ too (you only need to set the default audio interface in ALSA Mixer and configuring volume knob is more fiddly). Just download the zip and get the image to your microSD card. The bigger card the better, I used 16 GB. Using Linux Mint I’ve utilized pre-installed USB Image Writer tool but you can use any appropriate tool/way on your OS. For Windows I can recommend Win32 Disk Imager. I can’t tell what’s best on Mac.
After you boot your image you’ll be guided through standard Raspbian installation process. Expanding the file-system to the full size of your card is recommended. I tweaked other few things with raspi-config like the keyboard layouts (I prefer US over default UK layout for coding purposes), timezones etc. Then the config.txt had to be edited as well.
UPDATE: The latest Raspbian image by IQAudio (Jessie) works pretty well. It skips the initial Pi configuration and you can set your system later. Also the JACK with RT and ~8ms latency is possible. See the details below.
Performance tweaks and boot config
You are on your own when it comes to overclocking the RPi but there is plenty of safe settings which will improve the performance. See the extensive instructions on the http://wiki.linuxaudio.org/wiki/raspberrypi.
Some more OC settings can be found in the article by Hayden James.
The only tweaks I did were:
> disabled CPU frequency scaling
> enabled full USB power
> overclocked the CPU to 1GHz (voids the warranty)
> configured the HDMI output accordingly to LCD used
> autologin startup with .profile launching the SunVox directly
Edit: Unfortunately I don’t have my original boot.txt config so I can’t share it.
Soundcard and JACK configuration
If you use the IQAudio preconfigured OS image, you don’t need to enable the soundcard. All is set. But I recommend to run alsamixer from the command line and switch the profile to ‘low latency’ one. I’m not sure what the DAC overclock settings do but I maxed them too.
>Screenshot of alsamixer
JACK is already pre-installed on IQAudio’s OS image but qJackCtl is not available in the menu by default. You have to go to start menu editor and enable it in sound/audio category. It might take some time until the changes in the menu are taken into the effect so don’t be surprised if it doesn’t show up immediately.
After you are able to run qJackCtl you need to do a further settings. Switch the device to PiDAC, disable duplex and set playback only. Activate the seq in MIDI field. Set the latency buffer to whatever works best for you. I’m able to run JACK on 44100 Hz with 256 samples buffer and 3 periods per buffer. RT should be already on, if not, activated it too. The RPi audio article recommends activating the Softmode to ignore the underruns. With this setting I can run heavy synths with 8ms latency and no underruns. Some included SunVox songs introduce xruns, usually they are not even audible as they get masked by other sounds. It depends on the song. Some ultra-heavy songs can still kill the RPi.
The conclusion is, if you use RPi & PiDAC+ & SunVox as a dedicated live mono-timbral synth, you’ll be fine. Splitting your keyboard by using MultiSynth module(s) opens the door to multi-timbrality. Classical SunVox song production workflow is of course in place as well and you can produce complete compositions.
Thank you for your patience if you managed to read till here. Also sorry to all who waited for this article for quite some time.
Have fun if you get inspired and build your own instrument. We live in a wonderful time of accessible technology.
Peace!